Adobe Premiere Pro (Pr)- Quick Start Guide
Create a Basic Sequence in Premiere Pro
Difficulty: Basic
What you will learn: Create a project in Premier Pro, Import media, Create a simple sequence, Export finished standalone media file.
Ready to find out more?
See our "Copyright for Digital Media" guide to help with sourcing open and/or free media to use.
Step 1 - Setup your workspace
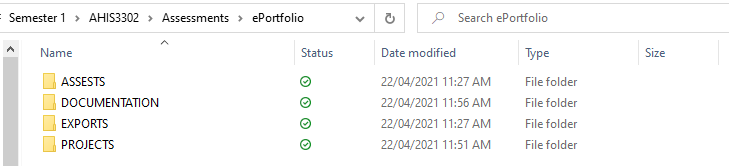
- In your 'Documents' folder create a new folder for your project
- Inside this folder you will create four sub folders
- ASSETS
- This folder will hold all the images, videos and sounds you wish to use. I recommend assigning a new sub-folder to each media type.
- DOCUMENTATION
- This folder will hold your assessment paperwork including AV script and Copyright details.
- EXPORT
- This is the folder you will export your final product to.
- PROJECTS
- This will be the folder that you create your Adobe Premier Pro project in.
- ASSETS
- Place your media in your 'ASSETS' folder. It is recommended that you organise your media into folders to make it easier to find.
- E.g. Audio, Images, Video
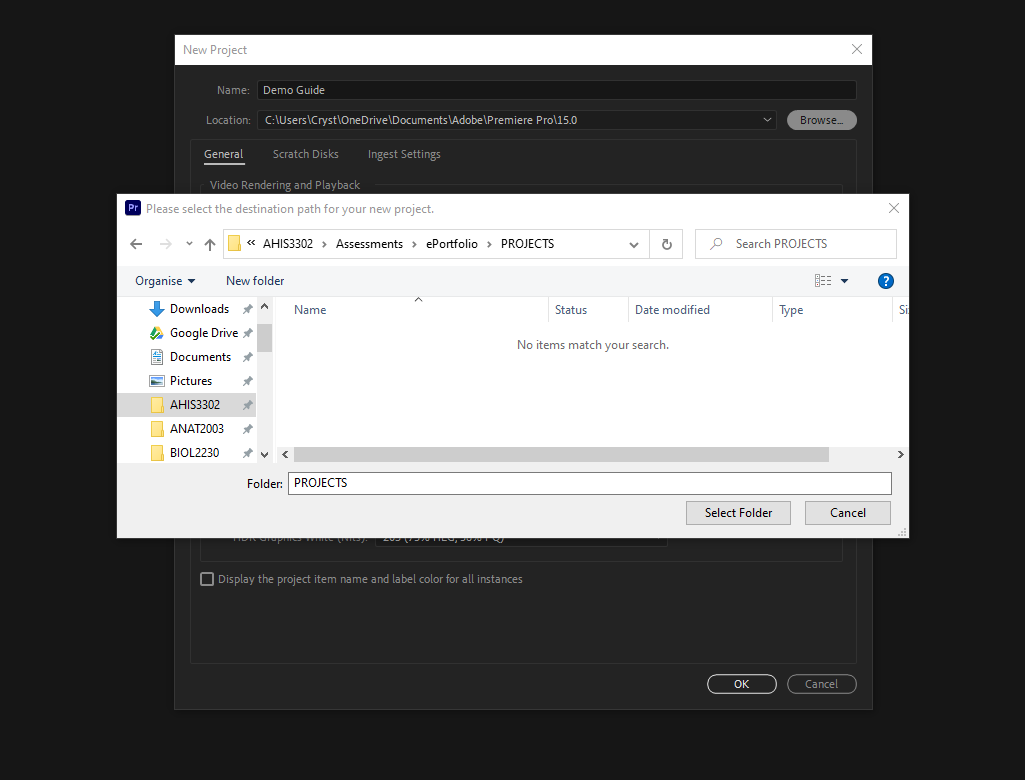
Step 2 - Create a new project
- Select 'New Project'
- Give your project a name and save it in your 'PROJECTS' folder

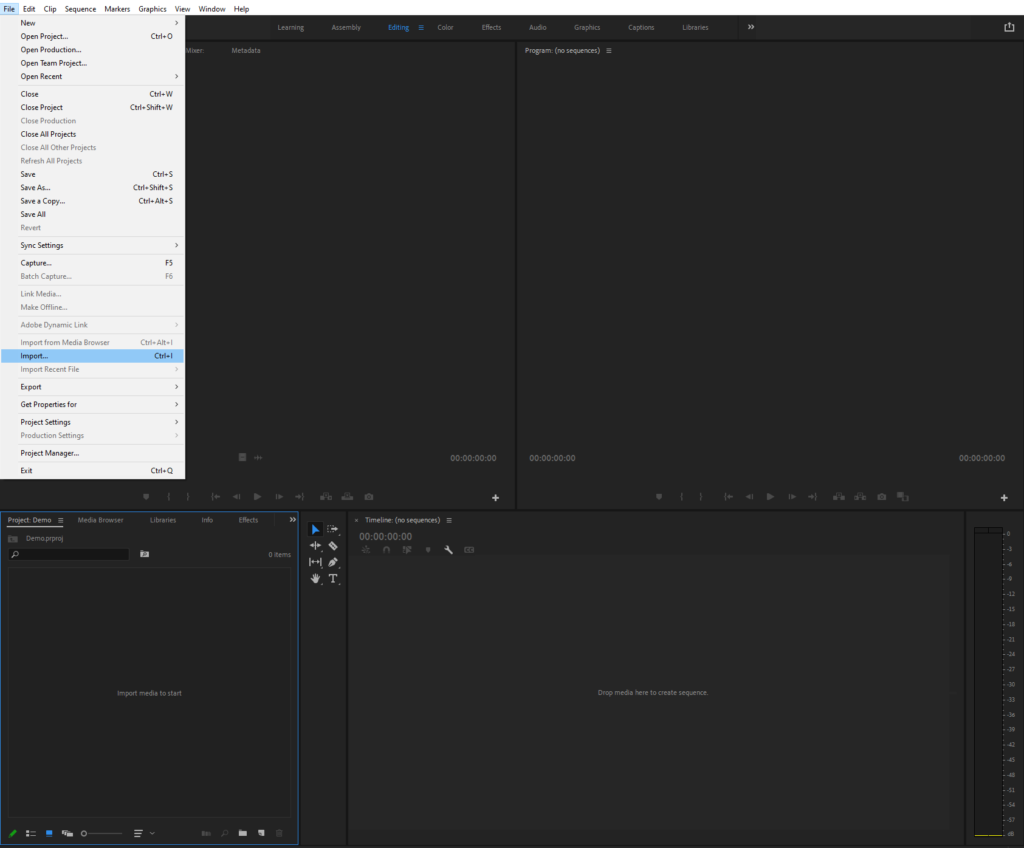
Step 3 - Import and organise your assets
- Select the ‘Projects’ field, then in the top left choose ‘File’ → ‘Import’.
- Locate your assets folder to import them into Adobe Premier Pro
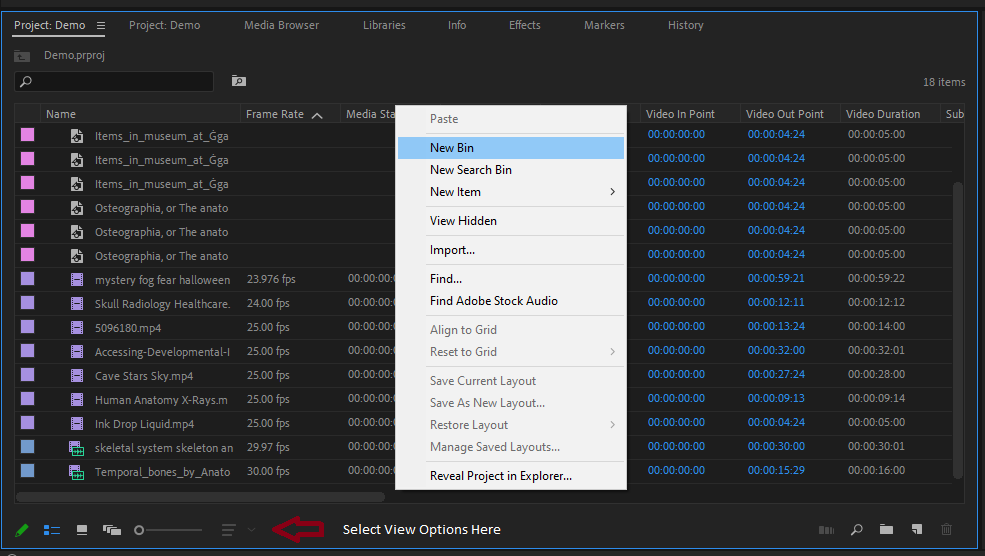
3. Right-click on an empty space in your ‘Projects’ field and selecting ‘New bin’ (folder)
4. Organise your assets into bins according to type, i.e. Video, Audio, Image

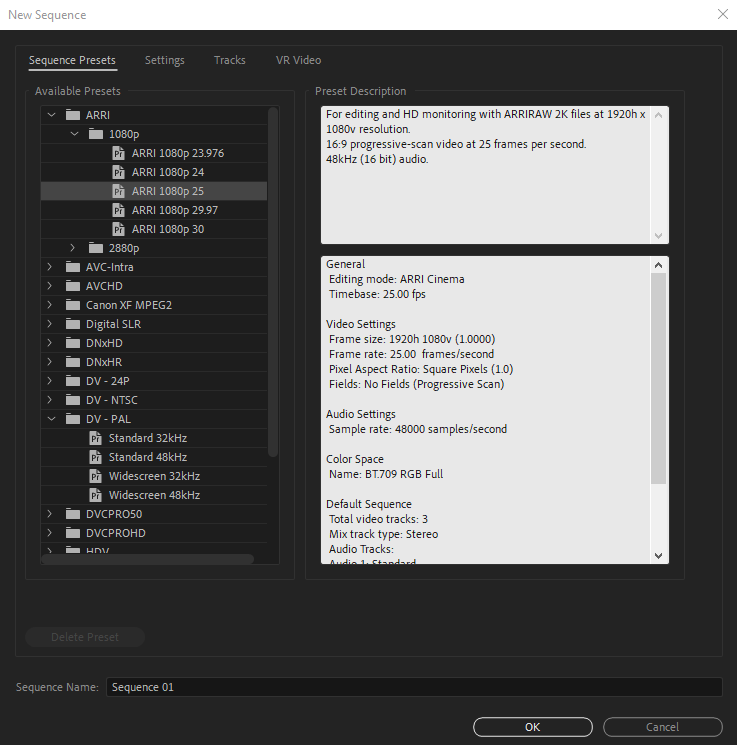
Step 4 - Setup a sequence
- You will first need to select the sequence field, then go to File > New > Sequence.
- Under the ‘AARI’ dropdown open '1080p' and select the ‘ARRI 1080p 25’ option
Step 5 - Add assets to sequence
- Simply select the asset you want from the 'Projects' field and drag it onto the timeline now in your 'Sequence' field.
- If prompted select "Keep existing settings"
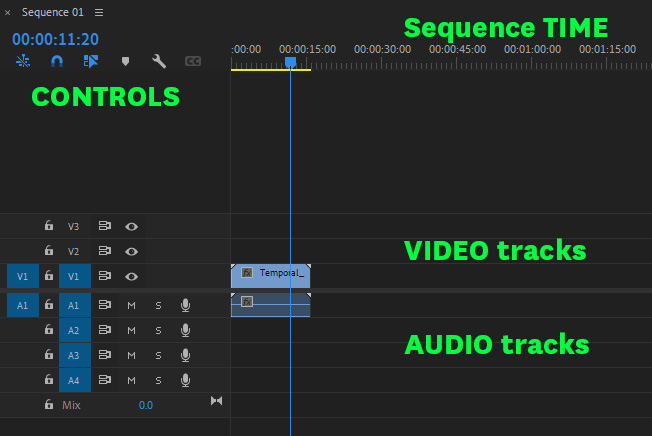
- You will notice that your timeline is divided into top and bottom
- The top labelled as 'V1-V3' is for visuals
- The bottom labelled as 'A1-A4' are for audio
- Be mindful that many videos also contain audio and this can be removed or edited separately.
Step 6 - Arrange your assets in the timeline
First, select the 'Arrow Tool' ![]() located in the box between your 'Projects' and 'Sequence' fields
located in the box between your 'Projects' and 'Sequence' fields
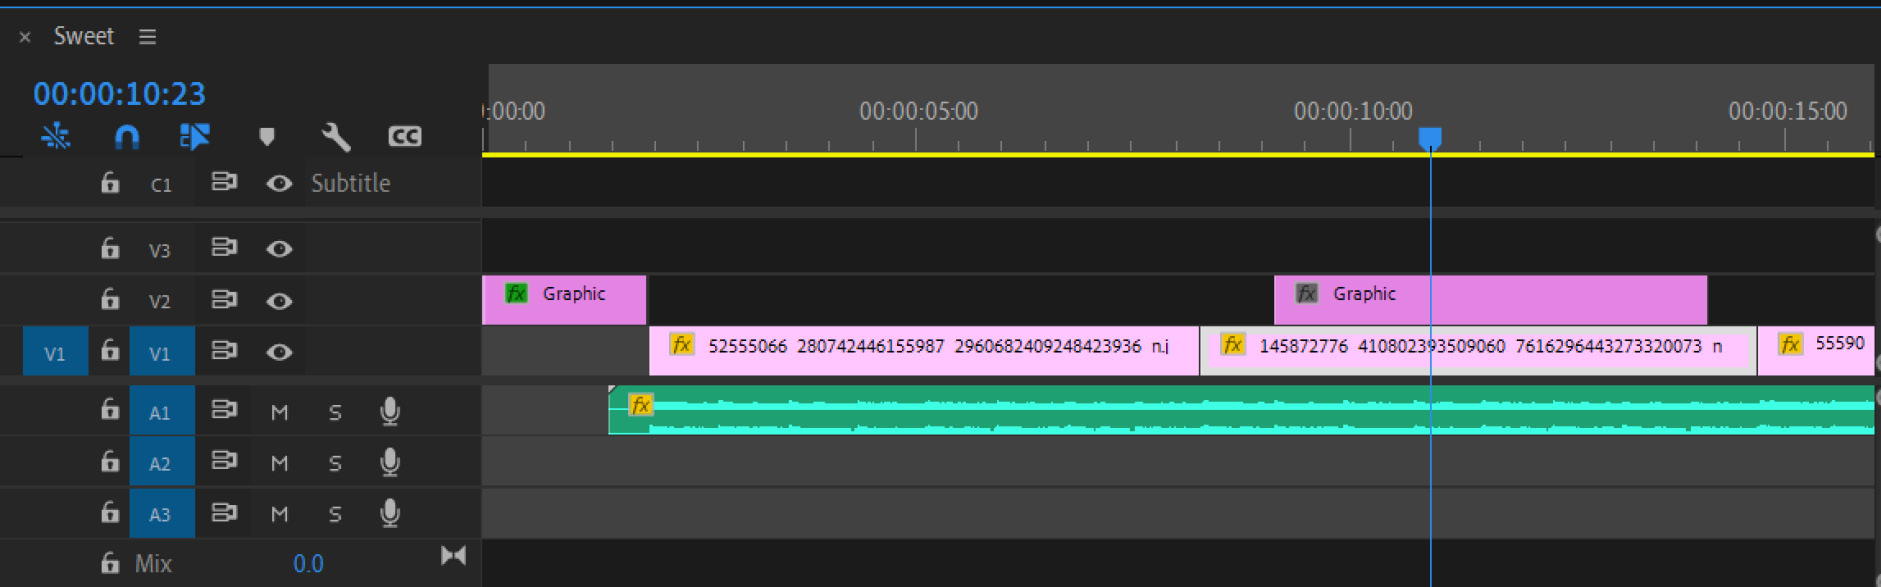
In your 'Sequence' field, click and drag your assets along the timeline until you're happy with the order that your assets will appear.
To edit a piece of media select the picture, audio, video file in the timeline, drag the video marker to a point on the timeline that includes the media file (if visual) so you can preview the changes.
Step 7 - Adding text
Choose your desired location in the timeline by sliding the blue timescale bar left or right in your 'Sequence' field.
Select the 'Text Tool' (T icon) from the same 'Tools' field you found your 'Arrow Tool' in.
Select anywhere on the preview in your 'Program' field (top right) and enter your text.
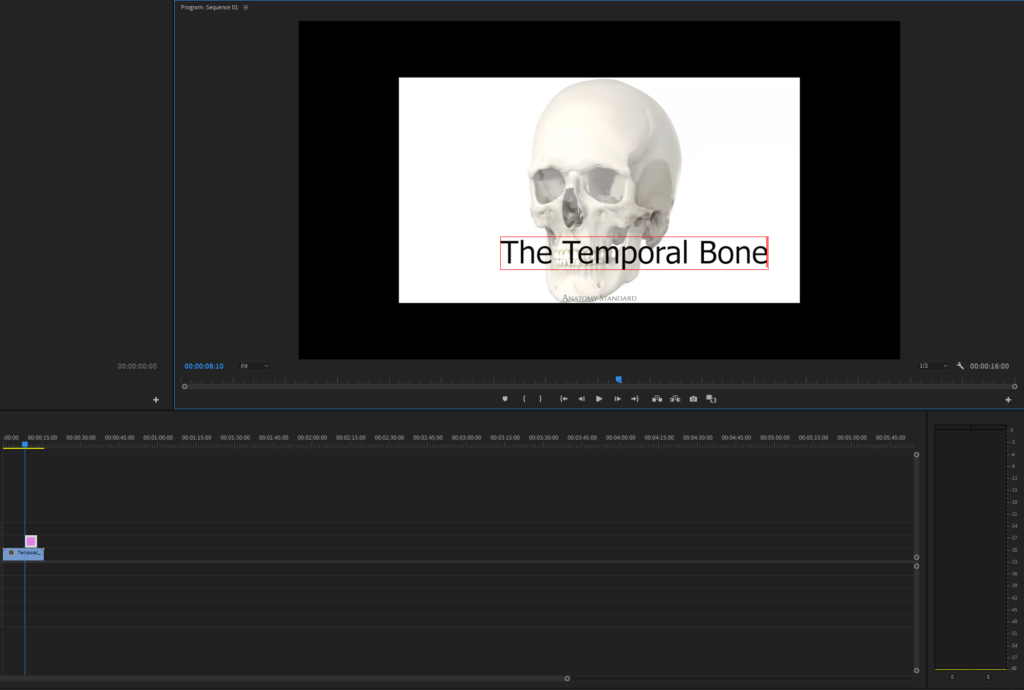
This text can be moved around until you're happy with its placement by clicking and dragging it around in the 'Program' field.
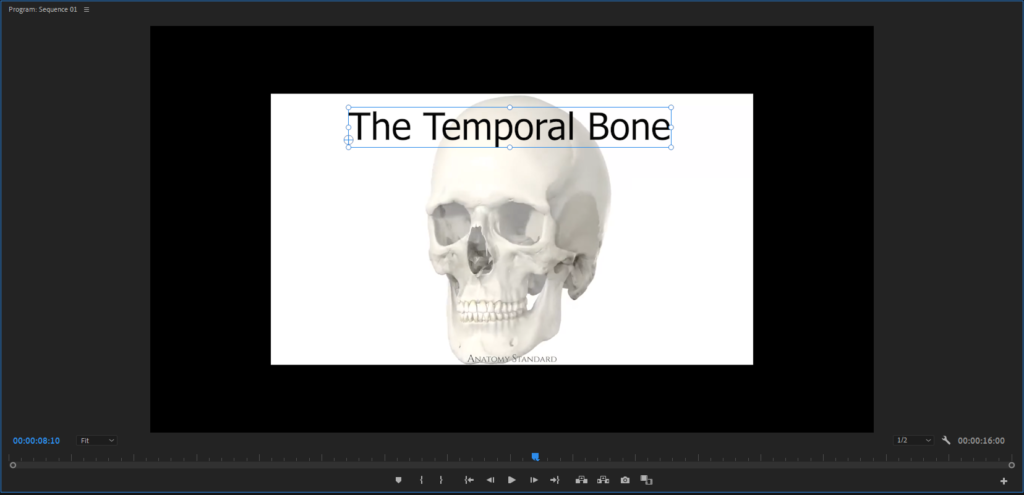
Note that this makes a new item on the top track of the timeline in your 'Sequence' field. If you want to move this text to a later point in your timeline simply drag it along.
Step 8 - Exporting your video
To preview the final product of your video drag the timescale bar to the start of your sequence and press the 'Play' button in your 'Program' field (Alternatively, press the 'Spacebar')
Do not worry if it skips and lags, Adobe Premiere Pro is attempting to play your video before rendering it. Large files with many assets or older computers may struggle.
Once you are happy with your final product and are ready to export it
- Select your 'Sequence' field. This is important as it tells Premiere what to export. When your sequence is the focus, it should have a blue line around it.
- Go File > Export > Media in the top left-hand corner of Adobe Premier Pro
- In the window that appears, name your final video by double clicking on the blue text next to the 'Output Name' option under the 'Export Settings' box in the top left
- Select the 'EXPORTS' folder you created in your documents earlier as your export location and give your project a name.
- Click on the 'Format' dropdown and choose 'H.264'.
- Click on the 'Preset' dropdown and choose 'Youtube 1080P full HD'
- Simply press the 'Export' and wait for your video to render. If you have multiple edits to export, you can choose 'Queue' which will add the video to Adobe Media Encoder. You can do many videos at once this way or you can keep working on another edit whilst it exports.
- Navigate to your 'EXPORTS' folder in your documents and play your finished video.
Ready to try some more?
Head on over to our 'Working with Premiere Pro' guide to learn how to create transitions and motion edits.