Difficulty: Advanced
What you will learn: How to create shape layers and manipulate their movement using trim paths, transformation tools and keyframes.
Step 1 – Creating Text
Note: In this guide I will be using the text animation created in the guide [Creating Unique, Simple Text Animations in After Effects] as a base. This guide can be applied to any text, animated or not. If you have pre-existing text you can skip to Step 2.
- Create a new After Effects project and composition from scratch.
More information on creating projects is in this guide [Beginning an After Effects Composition]. - Create a text layer by selecting the Text Tool and dragging out a text box in the composition window.
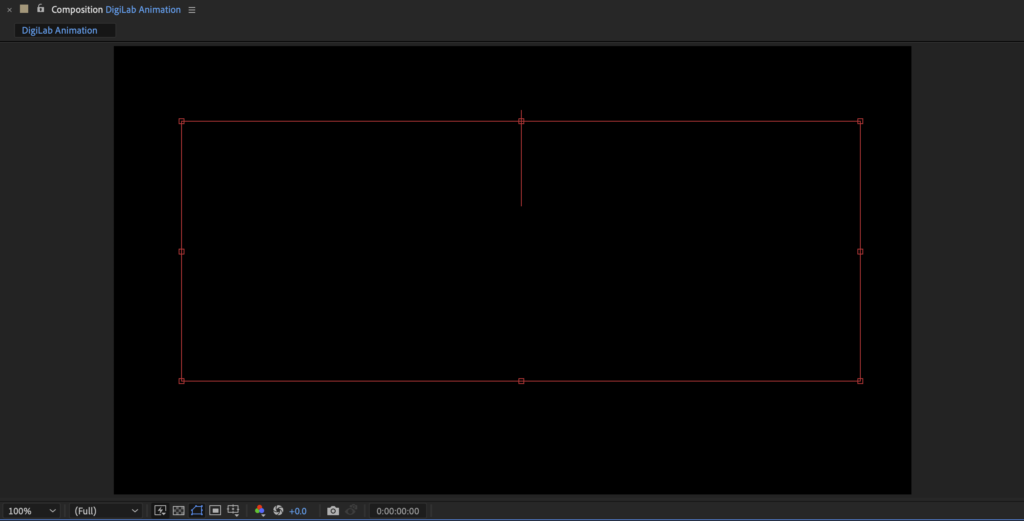
- Type the word or words you’d like to animate in the text box and highlight it with your cursor so all of the text is selected.
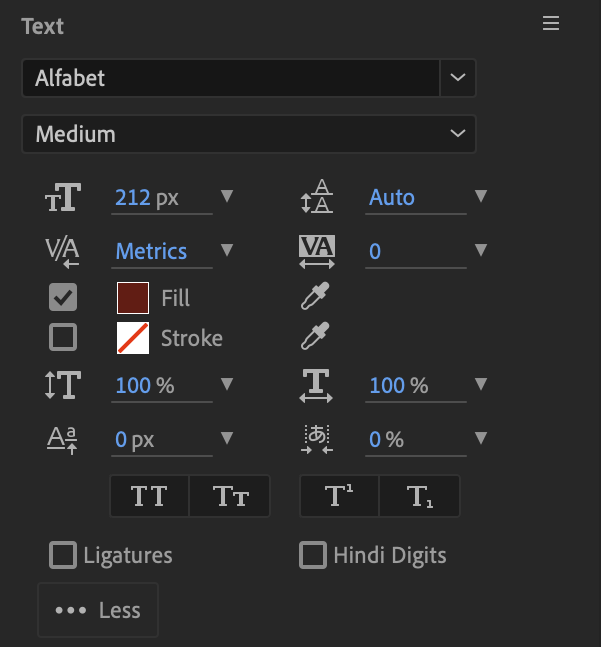
- Go to the “Text” panel at the right side of the screen and select a font type and a font size by manipulating the drop down menus.
Step 2 – Creating Shapes
- Navigate to the bottom of the composition panel, click the Grid icon (looks like a square with a crosshair in the middle) and select “Title/Action Safe”.
This will bring up a grid that shows both your centrepoint and horizontal axis points.

- Click the Selection Tool, then hold and drag your text so it sits in the very centre of the composition window.
- Select the Pen Tool from the top right hand side of the screen and click once on both of the horizontal axis points to create a line in between the two of them.
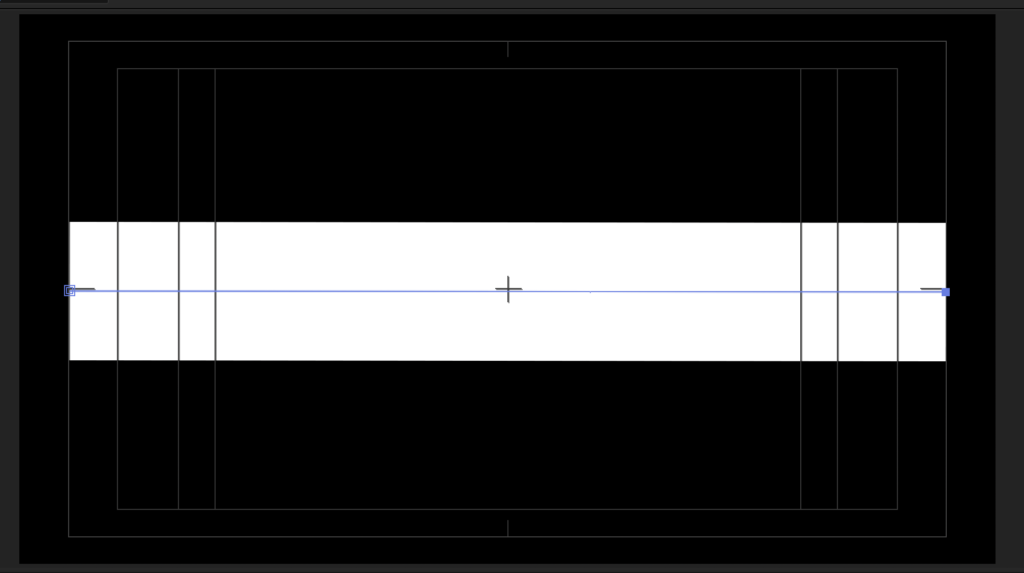
- Zoom into each of those points on the screen with the scroll wheel of your mouse (or “CMD” + “+” on your keyboard) and adjust either end of the line so that they are perfectly sitting on the axis points by clicking and dragging the end points with your mouse while using the pen tool.

- Zoom out so you have full view of the composition and then go to the “Shape Layer” on the bottom left hand side of your screen and click and drag it so that it sits underneath your text layer.
This will put your shape underneath the text in the composition. After this you can switch off the guides placed previously if you wish as they are not needed for the rest of this tutorial.

Step 3 – Customising Shapes
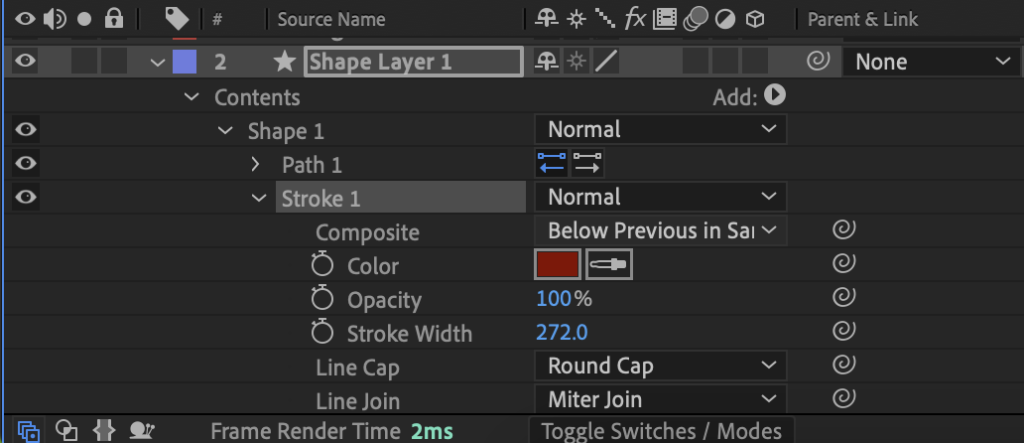
- Click on the arrow next to the “Shape Layer” on the bottom left hand of the screen to expand its option tree. Do the same again with “Stroke 1”.
- Adjust the “Stroke Width” until the shape is entirely covering the height of the text with a small bit of room on either end.
- Adjust the “Colour” to suit your preference by clicking on the colour box next to the option.
- Select the drop down box next to “Line Cap” and choose “Round Cap” to make the ends of the shape layer rounded.
If you select “Round Cap” and the ends don’t appear round, don’t worry, they will appear later as we move on with the animation. The rounded ends are currently being cut off by the ends of the composition window.
Step 4 – Trim Path Animation
- Collapse the “Stroke 1” tree and click on the “Add” button next to “Contents” and then select “Trim Paths”.
This tool allows you to animate which parts of the current shape you’d like to be visible at any given time.

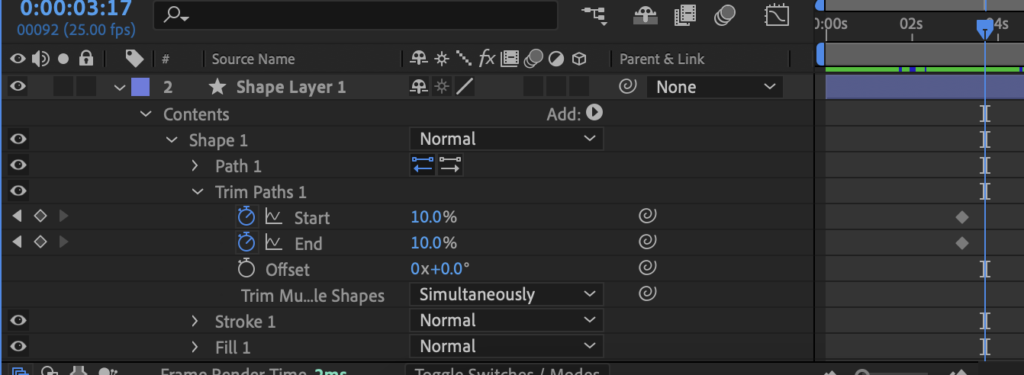
- Navigate to where on the timeline you’d like the animation to begin (at least 1 second into the composition minimum) and click the stopwatch icon next to both “Start” and “End” to set keyframes.
- Adjust the values of both “Start” and “End” until your shape is an almost perfect circle on the left-hand side of your text.
Note: Both the “Start” and “End” cannot be at the exact same percentage as that makes them disappear. Instead, put them a decimal place apart (e.g. 9.99 and 10).

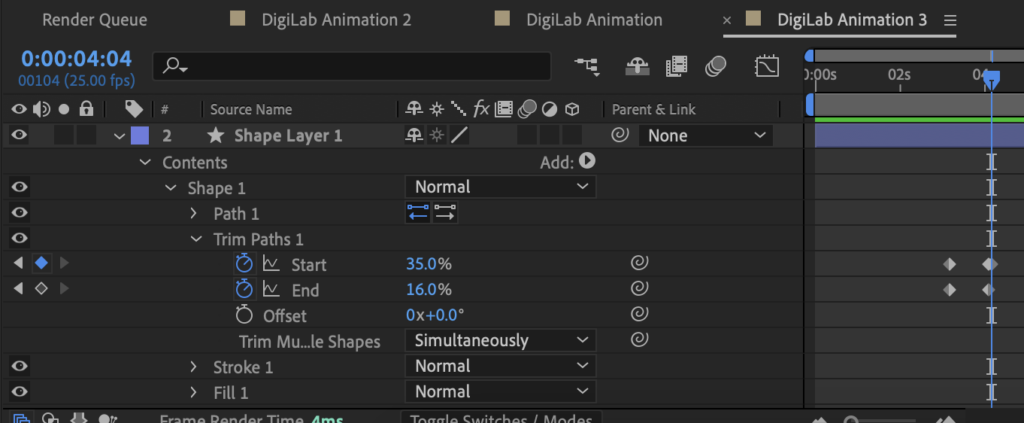
- Move your playhead further at least one second and move your “Start” and “End” point values so that the shape encompasses the entirety of the text perfectly.
This will create new keyframes automatically that move your shape from the first circle position to this new position in the space of one second.

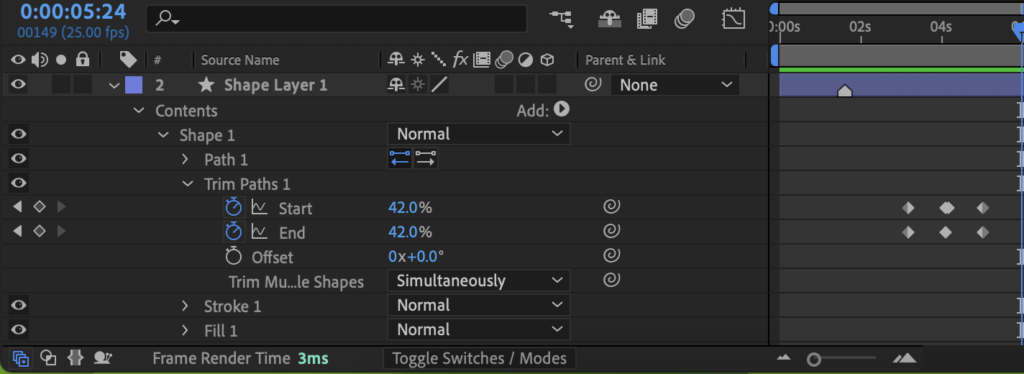
- Move your playhead again at least one second and move your “Start” and “End” points to be a perfect circle just like last time, but on the right-hand side of the text.
If you play the composition, it should start with a circle on one end of the text, which elongates into a line that covers the whole text and finishes as a circle on the other side of the text.

- Highlight all the keyframes made for both “Start” and “End” by clicking and dragging a selection box with your mouse over them all and right click.
- Select “Keyframe Interpolation” and then “Auto-Bezier”.
This will smoothen out the keyframes and make the animation feel less stiff.

Step 5 – Adding an Entrance
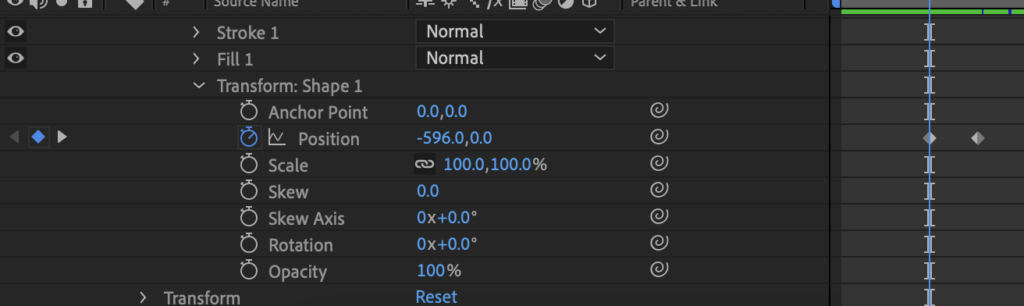
- Collapse “Trim Paths 1” and expand the “Transform: Shape 1” window on the left-hand side of the screen.
- Navigate to the start of the animation when the circle is on the left-hand side of the text and click the stopwatch icon next to “Position”.
Note: As mentioned before, the start of the animation should be at least one second into the composition minimum. - Pull back your playhead one second and set the x-axis of your position value so that the circle is just off the left-hand side of the screen.
This will put your circle off-screen until a second before the animation where it will slide over just before the animation starts.

Step 6 – Finishing it Off
- Collapse “Trim Paths 1” and expand the “Transform: Shape 1” window on the left-hand side of the screen.
- Navigate to the end of the animation on the frame that the shape becomes a perfect circle again on the right-hand side of the text.
An easy way to do this is to line up the playhead with the final keyframe made for the “Start” and “End” points. - Click the diamond shape on the left-hand side of the “Position” stopwatch to add a new keyframe.
- Click the stopwatch next to “Scale” to start keyframe mode for scale.
You do not need to create new keyframes using the diamond-shaped button when you first enter keyframe mode as it sets one automatically. - Move a few frames (no more than .5 seconds) on the timeline and adjust both the “Position” and “Scale” values so that the circle is around a quarter of the size and sitting next to the bottom of the text as if it was a punctuation mark.
You will need to make small adjustments to “Scale” and “Position” one after another in order to get it in the right spot. This can take some tinkering. These keyframes will make the large circle transform into a small punctuation mark next to the text. - Make a micro-adjustment of a frame or two on the timeline and adjust the scale to be larger by 5%. You may also need to adjust the position to get it back in a place where it looks natural.
This will create a bubble-like effect that makes shape movements feel more natural by shrinking and then enlarging ever-so-slightly.


Step 7 – More Options & Exporting
- By manipulating “Transform: Shape 1” with keyframes at any point in your composition and using “Trim Path”, you can make any number of interesting animations that can both accompany and stand-alone from text.
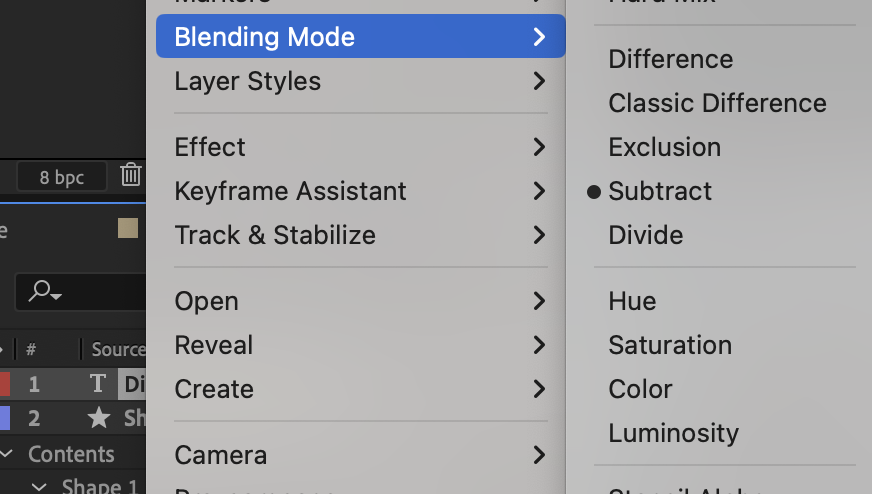
- Playing with “Blending Modes” can enhance how different objects or objects and text interact with each other. Right-click on the “Text Layer” and then select “Blending Mode” to change this. The one used in the example is “Subtract”.

- To export this project you will need to export with the transparent background, which works differently depending on if you’re putting the animation into Premiere Pro or different software. Check out our guide here [Finishing an After Effects Composition] on the different ways to get your project out of After Effects.