Adobe Photoshop (Ps) - Tutorial 2
10 essential things to get started with Photoshop
Difficulty: Easy
What you will learn:
- Pixel Sizes
- Pixel Resolution vs Pixel Density
- Colour Models
- Colour Models
- Colour Spaces
- Resizing and Cropping
- Image Resizing
- Canvas Resizing
- Cropping
- Working Non-Destructively
- Smart Objects
- Working on Separate Layers
- Use Adjustment Layers
- Image Adjustment
- Curves
- Hue/Saturation
- Colour Balance
- Selection and Masking
- Quick Selection Tool
- Lasso Tool
- Rectangle Marquee Tool
- Masking
- Working with Text
- Removing Unwanted Objects from Images
- Healing Brush Tool
- Patch Tool
- Rulers and Guide Lines
- Rulers
- Guidelines
- File Formats
- JPG
- PNG
- TIFF
- PSD
- PSB
Reference image used through out guide: Adi Kavazovic (2021)
1) Pixel sizes
Images in Photoshop are raster graphics, meaning the image is compiled of millions of pixels. A disadvantage of raster images is that images can only be upscaled to a certain extent before they appear pixelated.
Due to the limitations of raster graphics, the highest resolution for an image should be used to allow flexibility in changing the resolution when exporting.
Pixel Resolution
Resolution: the horizontal and vertical pixel count of an image.
Higher-resolution images have a greater number of pixels which improves the sharpness.
Examples of common pixel resolutions: 1280x720 (HD), 1920x1080 (FHD), 3840x2160 (4K UHDTV)
Pixel Density (also referred to as resolution)
Pixels per inch (ppi): the number of pixels per inch of the display; the greater the number, the higher the quality.
Dots per inch (dpi): the number of ink dots per inch of the image. The greater the number, the higher the quality. This measurement is used when printing.
Note: Pixel resolution and pixel density are not the same. Pixel resolution determines the quality of the image when displayed on digital screens. Meanwhile, PPI/DPI is used to determine the image quality when printing.
2) Colour Models and Colour Spaces
Colour Models
Colour Model: systems that deconstruct the makeup of colours into different attributes.
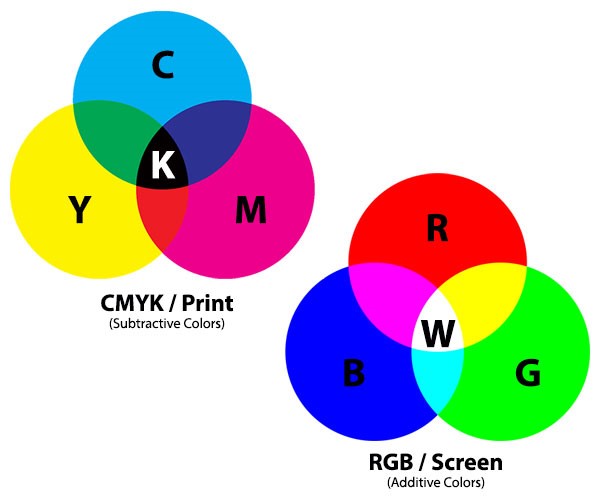
There are three main types of colour models which are: RGB, CMYK and HSL.
RBG is an additive model used for digital-based designs and is comprised of the primary colours red, blue and green. The additive model starts with a black canvas and becomes lighter and lighter when RGB colours are added.
CMYK is a subtractive model used for print work and is comprised of Cyan, Magenta, Yellow and Key (Black). The subtractive model is the opposite of the additive model as the canvas starts as white becomes black as cyan, magenta, yellow and black are added. Different levels of cyan, magenta and yellow are subtracted from the canvas to lighten the colour.
Talbot. J. (2017). What is CMYK? What does it stand for & what does it mean?. Instant Print. https://www.instantprint.co.uk/printspiration/print-design-tips/what-is-cmyk.
HSL (also known as HSV or HSB) is a colour model comprised of hue, saturation and lightness. It is another model similar to RGB, however, is more intuitive for designers. Hue is a pure colour from the colour wheel with no shade or tint added to it. Saturation is the intensity of the colour. Lightness is the brightness of the colour.
Note: If you are designing something for digital purposes, use RGB. If you are designing something for printing purposes, use CMYK.
Colour Spaces
Colour spaces: mathematical models of different ranges of the colour spectrum.
There are three main types of colour spaces which are: sRGB, Adobe RBG, ProPhoto RGB.
Each colour space displays a certain range of the colour spectrum which is illustrated in the diagram below:

Photo Review. 2014. Colour spaces explained. https://www.photoreview.com.au/tips/outputting/colour-spaces-explained/.
As shown in the diagram, Adobe RGB and ProPhoto RBG display a larger range of colours compared to sRBG, meanwhile, ProPhoto RGB has the widest range.
Typically, sRBG is used in designs as it is the most compatible colour space across all ranges of devices and screens. Unless you are professionally printing, it is recommended to use sRGB to make the image compatible with most devices.
3) Resizing and Cropping
Image Resize: changes the size of the selected image.
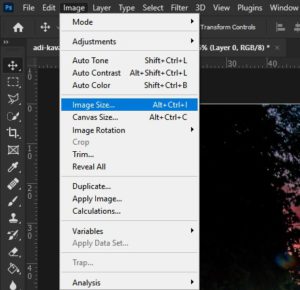
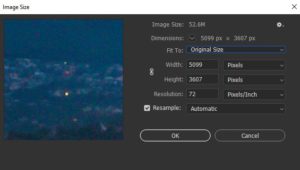
Image Size: how much storage space the image consumes.
Dimensions: the height and width of the image.
Fit To: options to set the image to common dimension presets (e.g. A4, 4 x 6 inches)
Width & Height: change the height and width based on the number of pixels (pixels can be changed to other units of measurement via the drop-down menu)
Resolution: change the pixel per inch (PPI) resolution of the image.
Resample: image interpolation when rescaling the image. (i.e. when upscaling an image, an algorithm "adds" extra pixels to unknown areas based on the estimated values of existing pixels). It is recommended to leave resample on Automatic.
Canvas Resize: changes the size of the canvas in the document.
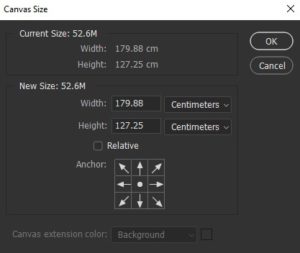
Current Size: the amount of storage space the canvas currently consumes; also includes the current dimensions.
New Size: the amount of storage space the canvas will occupy after the changes to the size is applied. The unit of measurement can be changed from centimetres to other measurements via the drop-down menu.
Relative: how much to add or subtract from the canvas relative to its current size.
Anchor: changes the anchor location of where the canvas is resized from.
Cropping
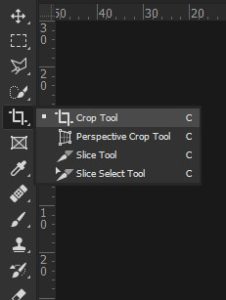
Select the Crop Tool (C) on the toolbar or press C.
Once the Crop Tool is selected, anchor points will appear in the corners and along the edges. Clicking and dragging these anchor points will move the crop. Areas within the crop border will remain, meanwhile, anything outside will be trimmed.
Before applying the crop, ensure that Delete Cropped Pixels is unchecked so the crop can be changed later if needed and is non-destructive.

4) Working Non-destructively
Smart Object
Smart objects allow nondestructive scaling, filter effects and camera raw edits to be applied to a layer while preserving the source content of the layer.
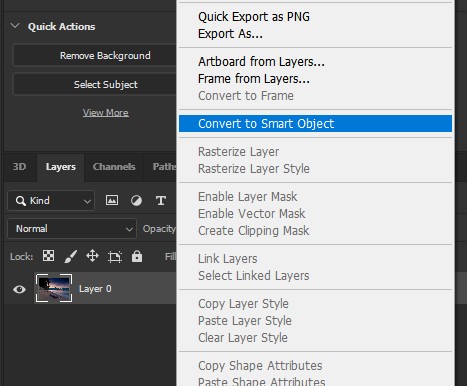
Right-click on a layer and select Convert to Smart Object to change the layer into a smart object.
An indicator that a layer is a smart object is the icon that appears on the layer's thumbnail.
![]()
Transform and filters can now be applied without affecting the source image.
Newly applied filters will be linked to the layer and listed under Smart Filter. Double-clicking on the filter in Smart Filter will allow the filter to be adjusted.
In the example screenshot below, a Gaussian Blur has been applied to the smart object layer.
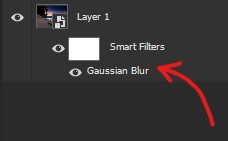
The Smart Filter can be used as an ordinary mask to nondestructively select where the filter effects are applied to the layer.
Working on Separate Layers
Working on separate layers allows for flexibility in adjusting or redoing edits that have been made in the past. If mistakes were made, it allows the designer to make changes instead of restarting from scratch.
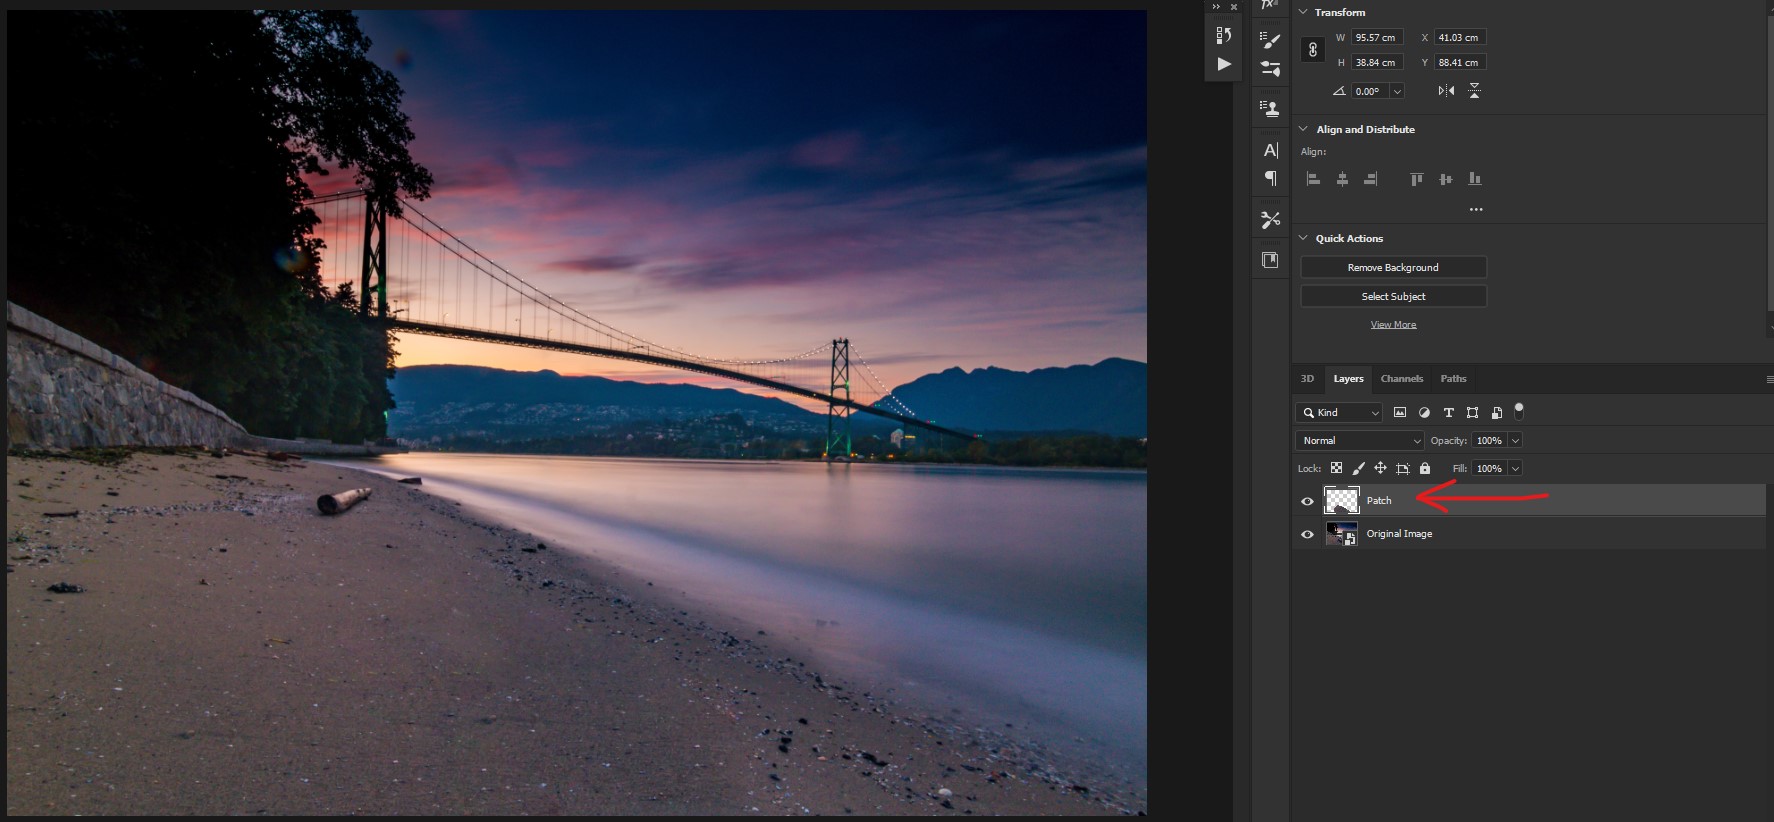
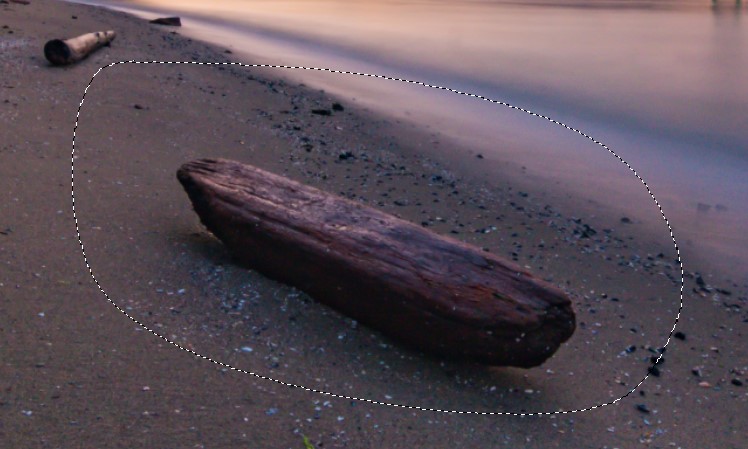
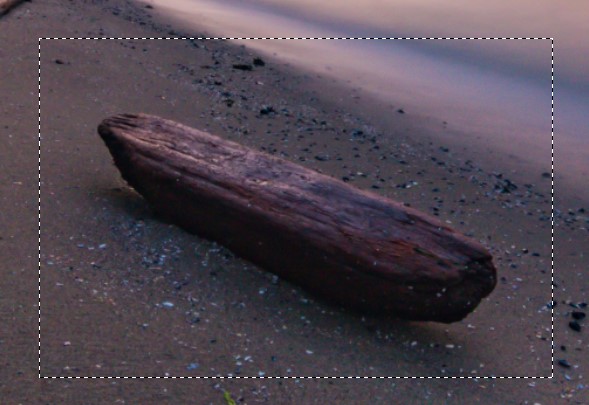
For example in the image below, the edits which cover up and remove the log are placed on a separate layer from the image source.
Original image:
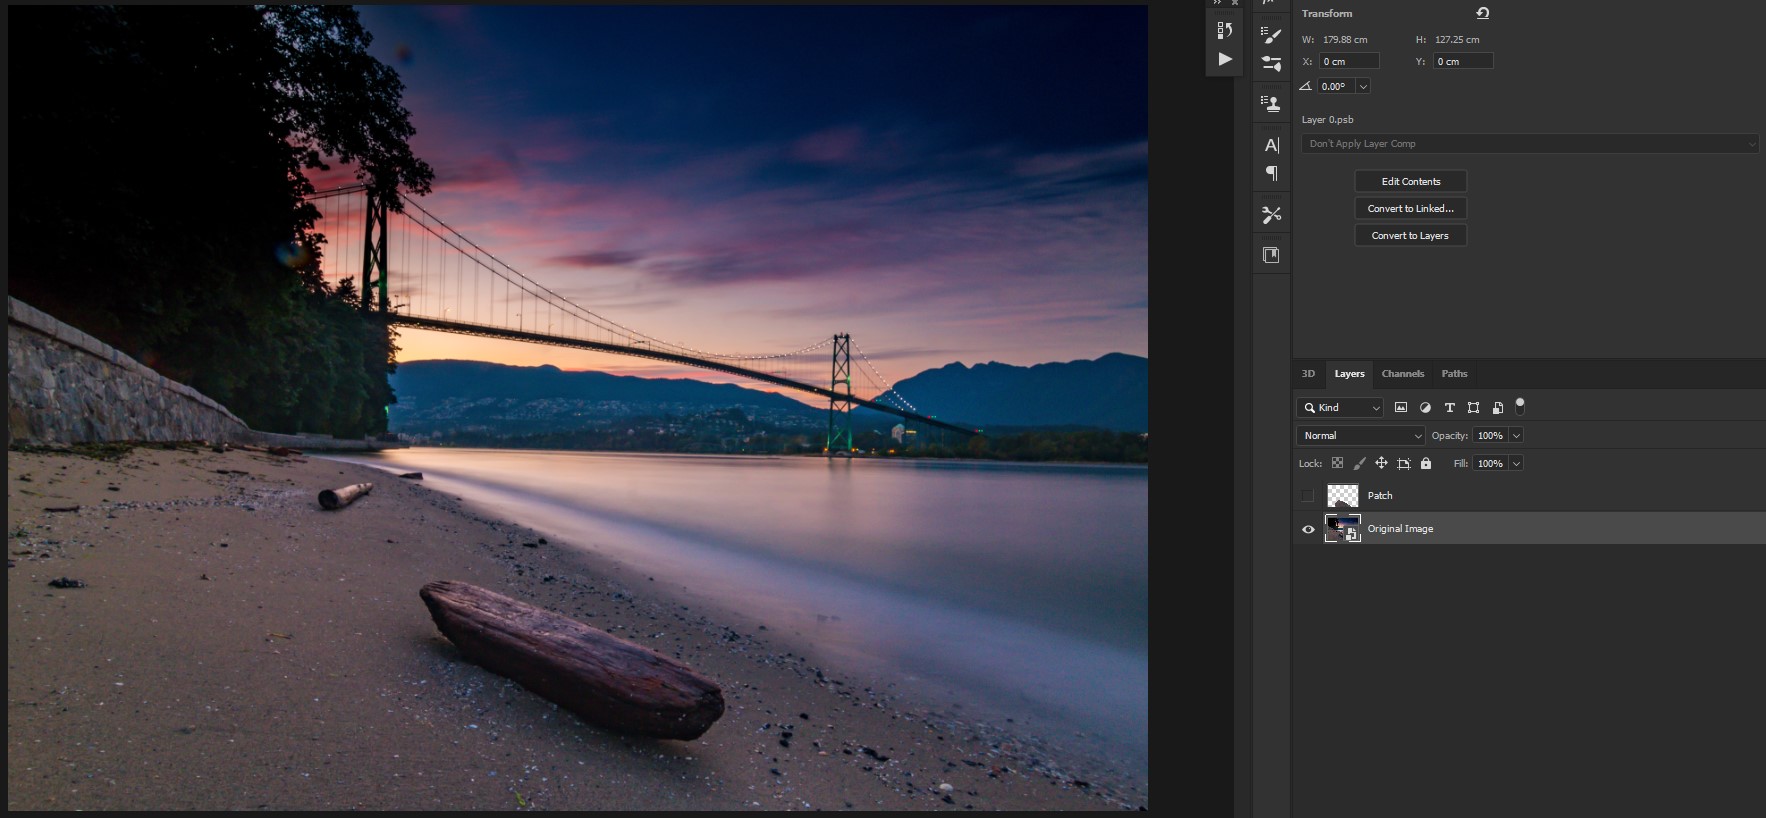
Original image with another layer on top with edits that cover up the log:
Use Adjustment Layers
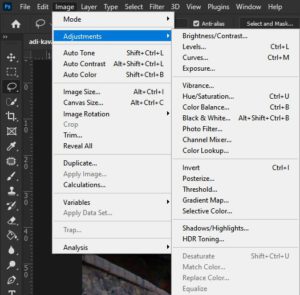
There are two ways to add filters to images in Photoshop which is via the menu (Image > Adjustment > Filters) or in the Adjustment Panel.
Menu (Image > Adjustment > Filters)
Adjustment Panel
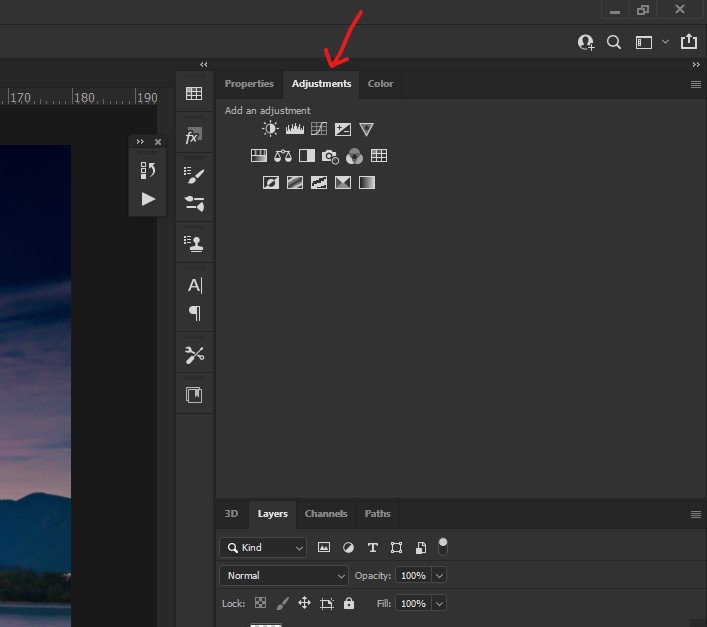
Once an adjustment is added to a layer via the Menu, the adjustment is permanently applied to it, it cannot be changed again. However, when an adjustment is added to a layer via the Adjustment Panel, the adjustment is added as a layer. This allows designers to select the adjustment layer in the Layers Panel and make changes later.
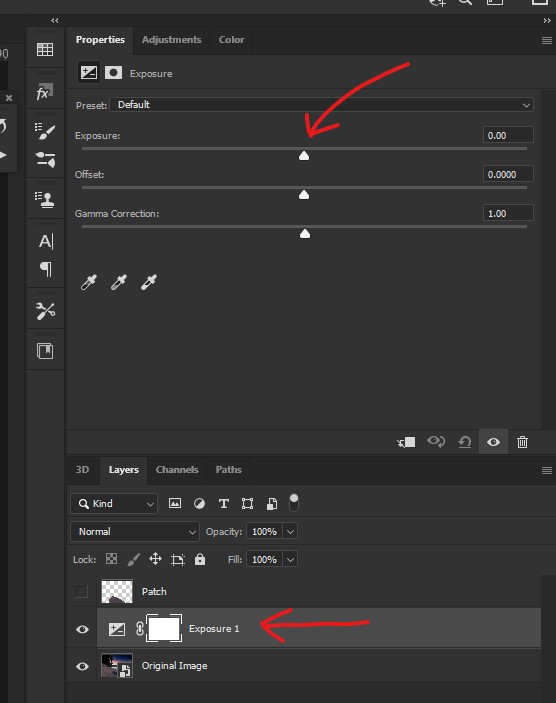
In the image above, an exposure adjustment layer was added from the Adjustment Panel and has created a new layer. At the top of the image, the exposure settings for the adjustment layer can be tweaked.
Note: Adjustment layers will affect every layer below it in the layer stack. If you want the adjustment layer to only affect the layer below it, use a clipping mask.
5) Image Adjustment
There are three main types of adjustment layers used to manipulate images which are: Curves, Hue/Saturation and Colour Balance.
Curves
Curves are one of the most useful adjustment layers due to their versatility. Curves plot all the tonal values of the image from darkest to brightest on a graph. Manipulation of the diagonal line on the graph will affect the exposure level or contrast in different parts of the image.
Click on the curve (diagonal line) to add a control point that can be moved to adjust the exposure.

Red is the black point (darkest point) while Blue is the white point (brightest point).
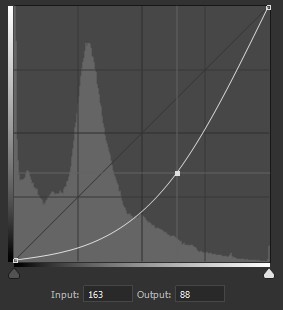
Exposure
Moving the curve upwards increases exposure.
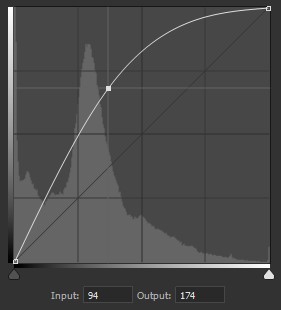
Moving the curve downwards decreases exposure.
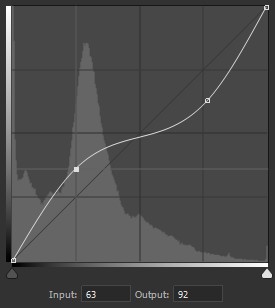
Contrast
Adding two control points allows you to change the contrast of the image.
Decreasing the shadows and increasing the highlights will increase the contrast.

Increasing the shadows and decreasing the highlights will decrease the contrast.
Hue/Saturation
Hue/Saturation allows you to change the appearance of colours.
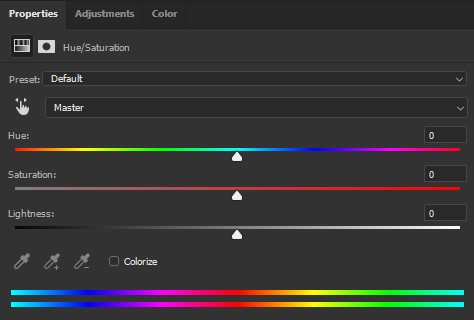
Hue: changes the pigment of the colour.
Saturation: changes the intensity of the colour.
Lightness: changes the brightness of the colour.
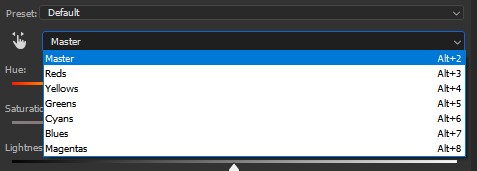
The default colour selection is Master meaning that the adjustment layer will affect all colours in the image. The colour selection can be changed to only affect a single type of colour. E.g. Having reds selected will only change the hue, saturation and lightness of the colour reds in the image.
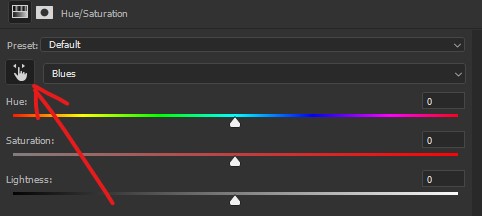
Selecting this hand icon will convert the cursor into an eyedropper to allow you to select a colour directly from the canvas.
Colour Balance
Colour balance allows you to change the colour grading of an image.
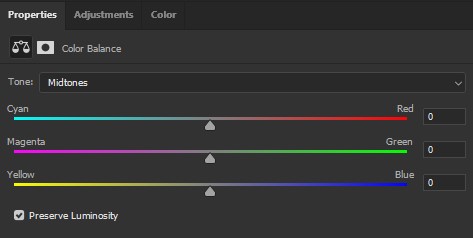
Moving the dial will change the colours closer to the colour that is displayed on each end of the slider. E.g. moving the top slider to the right will increase the amount of red and decrease the cyans in the mid-tones.
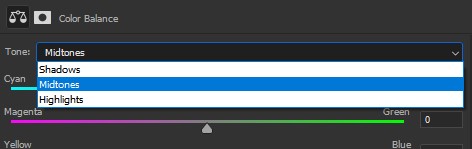
Changing the tone will allow you to control which parts of the tonal range is affected by the colour balance.
6) Selection and Masking
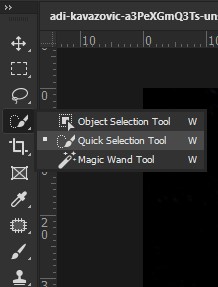
Quick Selection Tool
Select the Quick Selection Tool (W) from the toolbar.
Left-clicking on the canvas will create "marching ants", which is a checkered border that highlights which areas of the canvas is selected. Every pixel that is within the marching ants border will be a part of the selection.
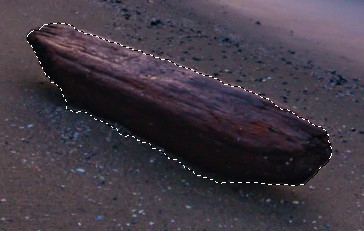
Hold Alt/Option and left-click on the areas of the canvas you would like to deselect/exclude from the selection.
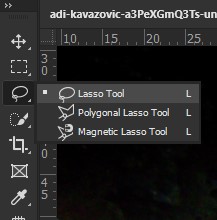
Lasso Tool
Select the Lasso Tool (L) from the toolbar.
Hold left-click and drag around the area of the canvas you would like to select. Releasing left-click will end the lasso.
Rectangle Marquee Tool
Select the Rectangle Marquee Tool (M) from the toolbar.
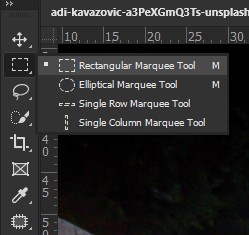
Hold left-click and drag over the area of the canvas you would like to select, release left-click to end the marquee tool.
Masking
Masking allows you to select which parts of the image to show or hide.
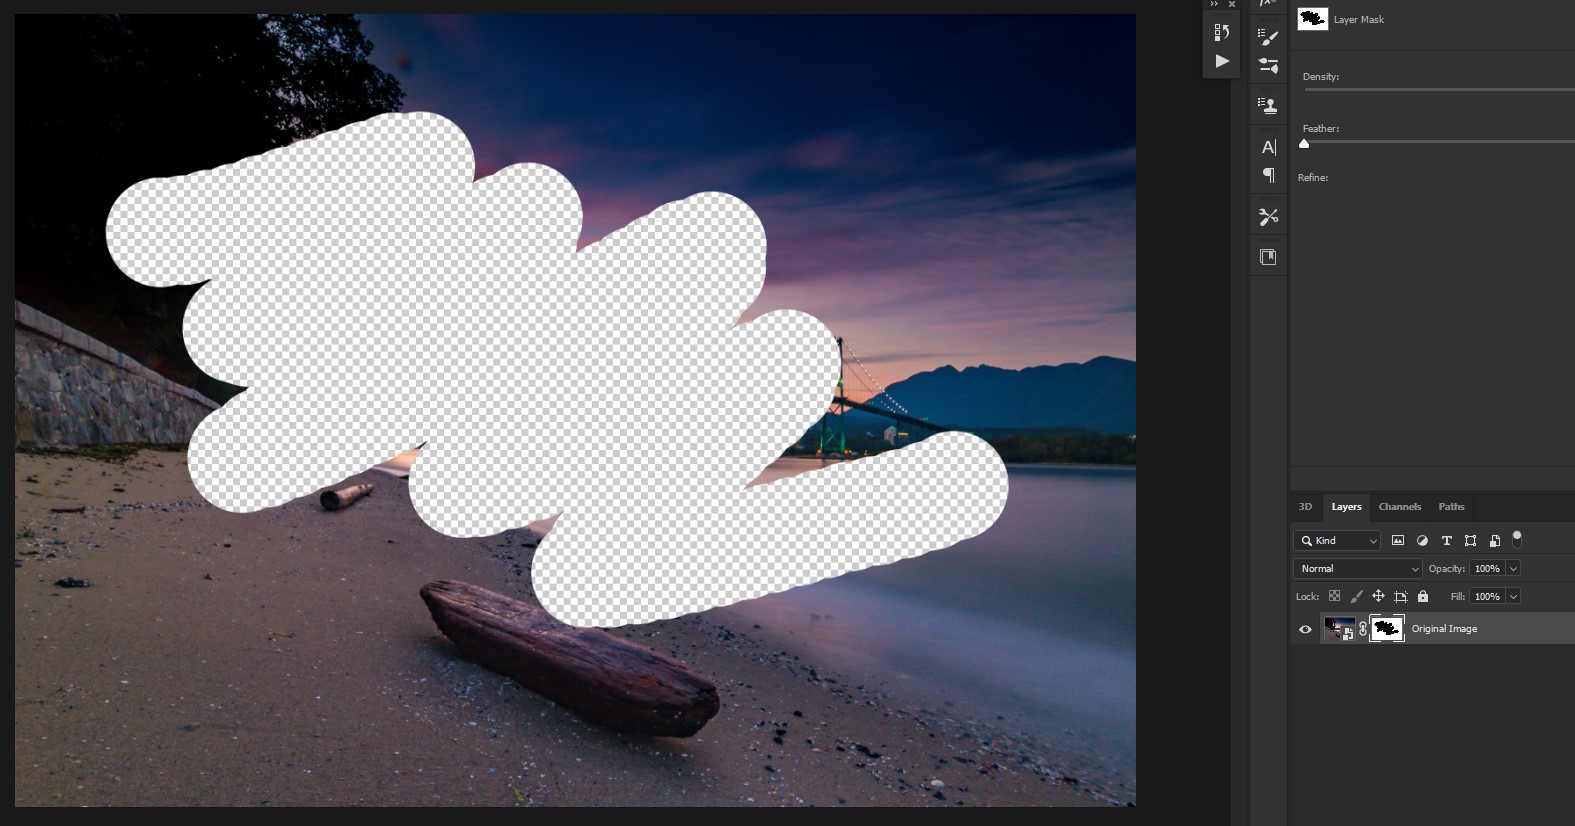
Important: Black = hides, white = shows
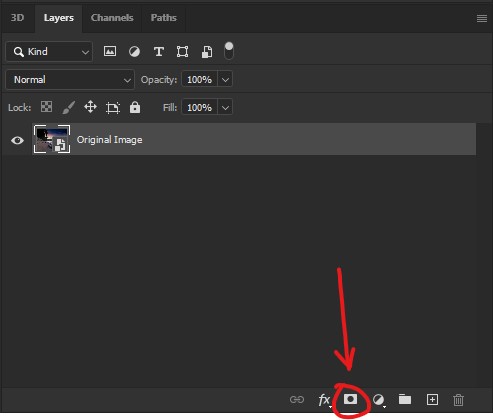
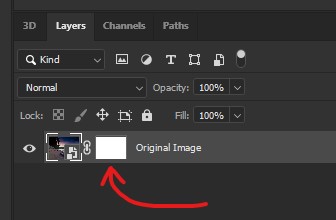
Click on the Add Layer Mask icon in the Layers Panel to add a mask to the selected layer.
A layer mask will look like this:
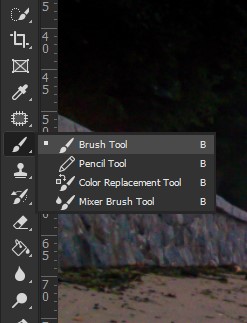
Using the Brush Tool (B), paint on the mask to hide or reveal parts of the layer.
Note: make sure that you have the mask selected when painting on it. The mask will have a border overlay around the thumbnail indicating that it's selected. As shown in the image below.

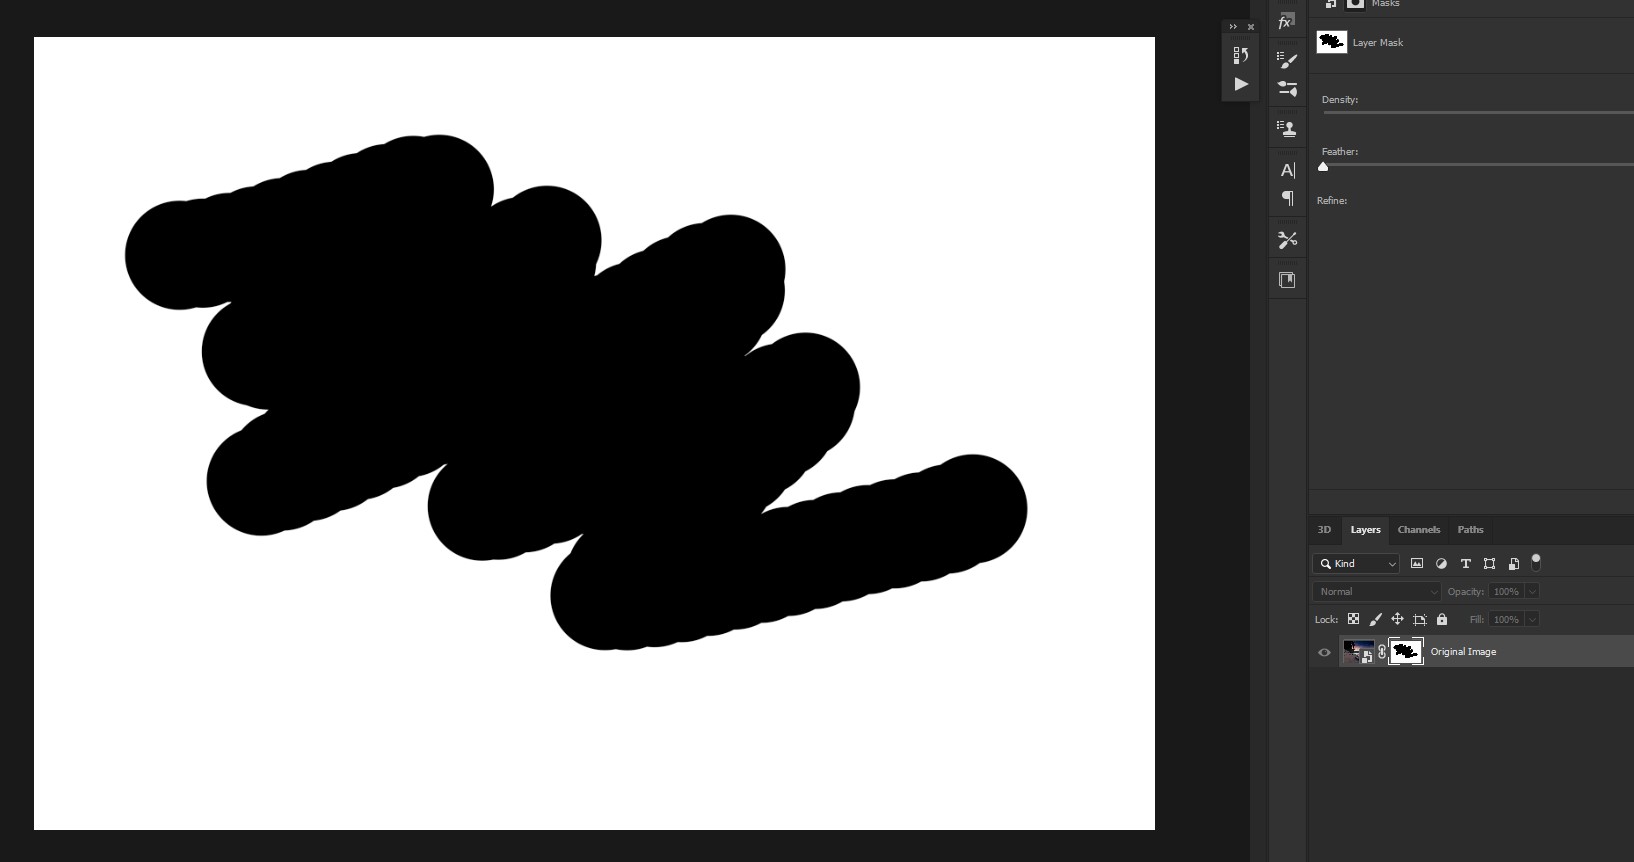
In the example below, I've painting black on the mask to hide parts of the image.
7) Working with Text
Select the Text Tool (T) from the toolbar.
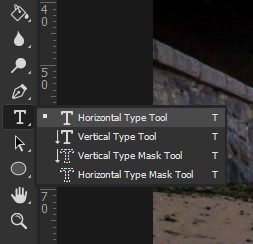
Clicking on the canvas with the Text Tool create a new textbox.

Red is the font.
Blue in the font type.
Green is the font size.
Purple is the text alignment.
Orange is the font colour.
8) Removing Unwanted Objects from Images
Objects in images can be removed using the: Healing Brush Tool and Patch Tool.
Note: it is recommended to edit the image on a separate layer from the source image to work non-destructively.
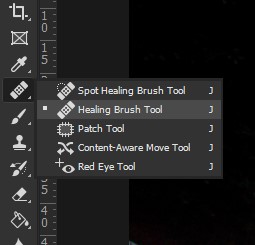
Healing Brush Tool
Select the Healing Brush Tool (J) from the toolbar. The Spot Healing Brush Tool will only appear on the toolbar. To access the Healing Brush Tool, right-click on the Spot Healing Brush Tool to access a drop-down menu of more tools.
Ensure that your settings are the same as the image below:
- Mode is set to Normal
- Source is set to Sampled
- Aligned has its checkbox ticked
- Sample is set to Current & Below

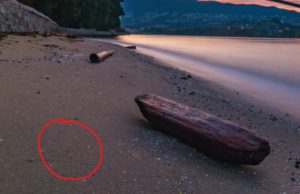
Hold Alt/Option and left-click on an area you would like to sample to replace the object in the image.
For example, to remove the log from the image, the sand would be sampled to cover up the log.
With a sample now being used, the Heal Brush Tool can be used to paint over the log now. Ensure that the new layer for editing (separate from the source image) is selected to paint on.
Use the Heal Brush Tool to paint over the log. The sample will continue to sample new areas of the canvas as you paint.
Note: The sample will move relative to the cursor. If this is undesired, uncheck the Aligned box in the topbar settings of the Heal Brush Tool.
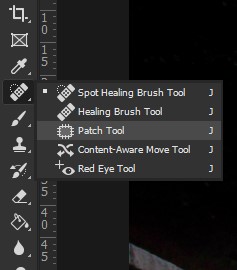
Patch Tool
Patch Tool uses the Lasso Selection Tool to sample a different part of the image to patch and replace the originally selected area.
Select the Patch Tool from the toolbar. The Patch Tool is also under the same drop-down menu as the Heal Brush Tool. Go to the Spot Heal Brush Tool and right-click on the icon to reveal the additional tool menu and select the Patch Tool.
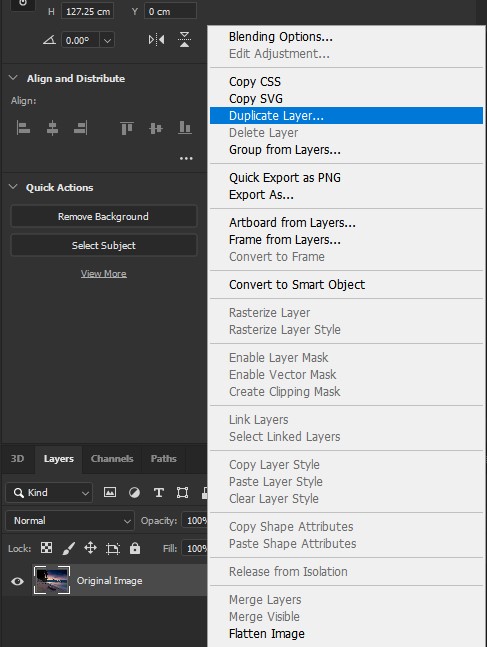
Important: the Patch Tool is a bit different as it is a destructive tool. The tool can only be used on the source image directly. A workaround to this issue is to duplicate the source image to a new layer. This creates a backup that can be used to revert back to the original image if a mistake is made.
To duplicate the source image, right-click on the layer and select Duplicate Layer.... and hit OK. Similarly, select the layer and press Ctrl/Command + J to duplicate the layer.

Ensure that the Patch Tool settings are similar to the image above:
- Use New Selection
- Patch set to Normal
- Use Source
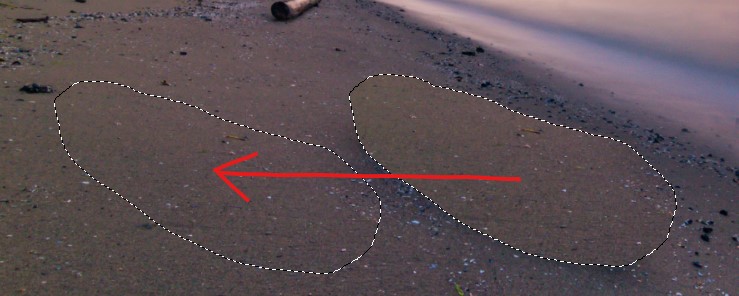
With the duplicate layer selected, use the Patch Tool to lasso select around the object.
Left-click and drag the selection to the sand to remove the log.
9) Rulers and Guidelines
Ruler
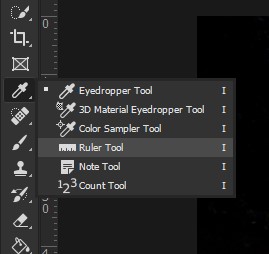
Select the Ruler from the toolbar by right-clicking on the Eyedropper Tool.
With the Ruler, left-click and drag from the start to the end of the object you are trying to measure. Release the left-click to end the ruler measurement.

The topbar settings will display the dimensions of the measurement. Clicking on Straighten Layer will straighten the image to be parallel with the ruler. Clear will remove the ruler from the canvas.

Guidelines
Go View > New Guide Layout... to create a new guide layout.
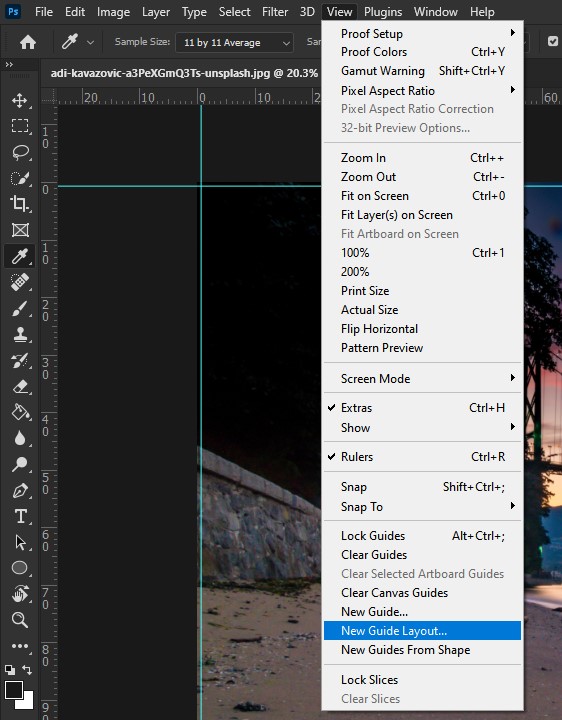
A new window will appear with settings to create the new guide layout.
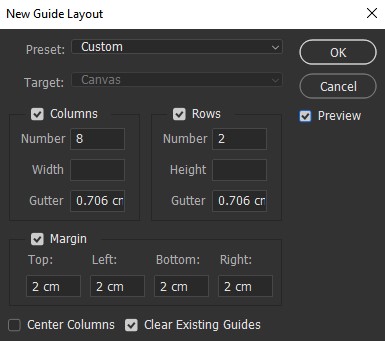
Change Preset to Custom and ensure that Preview is checked.
Having the Columns and Rows boxes checked will add guidelines along the vertical and horizontal axes.
Number will change the number of guidelines in the columns or rows.
Width will change the width between each guideline.
Gutter will change the spacing between each column or row.
Having the Margin box checked will add a margin to the edge of the guide layout with the dimensions being adjustable.
Clear Existing Guides will remove existing guides after the new guide layout is created.
Hit OK once all the settings are done.
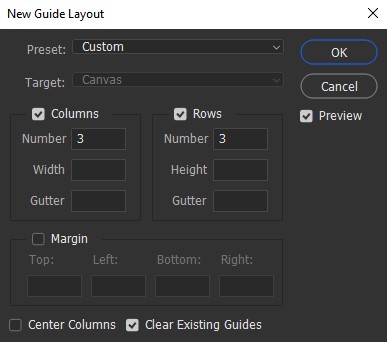
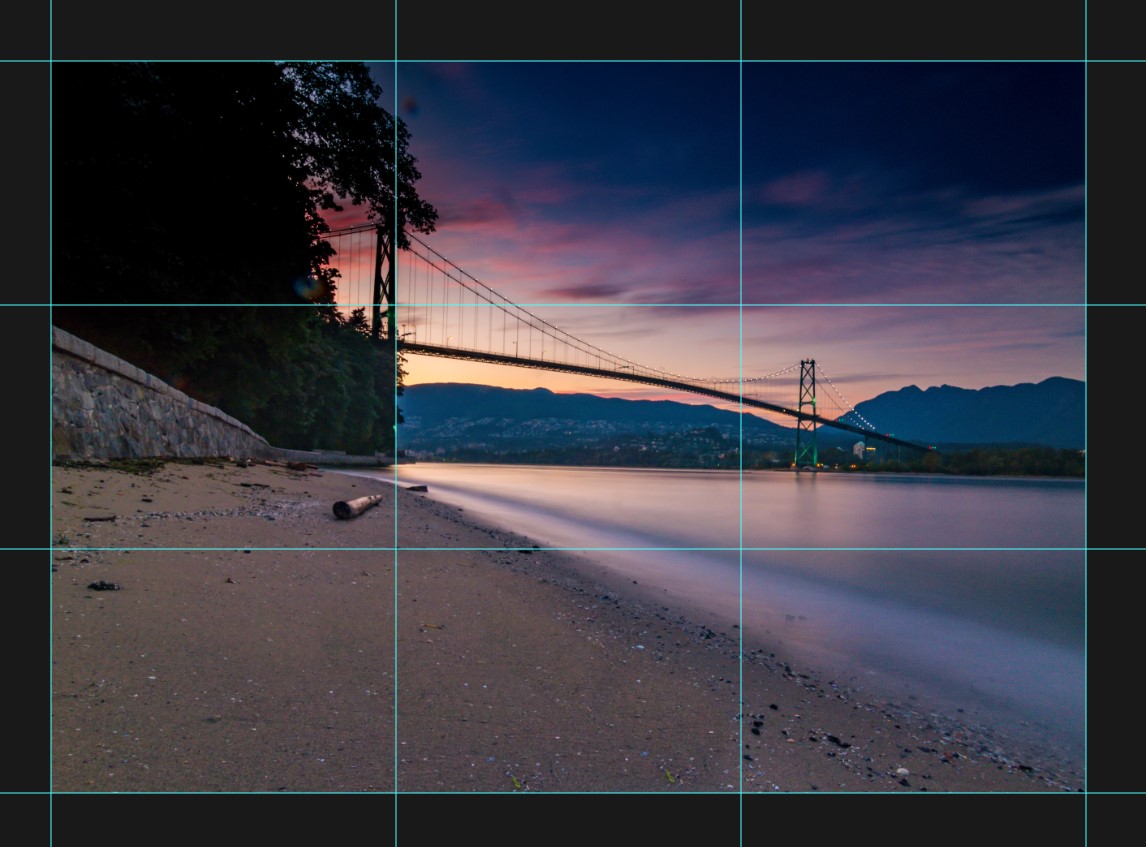
A commonly used guide layout is the 3x3 grid which has these settings and looks like this:
10) File Formats
Photoshop files can be exported as multiple formats although the most commonly used ones are: JPG, PNG and TIFF.
JPG is a lossy compression image format. As JPG is lossy, it loses image detail during the compression of the file, however, the file size is smaller compared to PNG.
PNG is a lossless compression image format. PNG retains all colour information during compression as it is lossless. However, the file size for PNGs is typically larger than JPG. In addition, PNG supports alpha channels which can include transparency in its images.
TIFF is a lossless non-compressed image format. As TIFF is uncompressed, it preserves the most quality in an image. Often used in professional work where the image is required to have its resolution and quality preserved. Since TIFF is uncompressed, the storage space is considerably larger than JPG and PNG.
Additionally, Photoshop files can be saved as two types of PSD files: PSD and PSB.
PSD is the standard file format for all Photoshop documents, however, it has a file size limit of 2GB and has a maximum image dimension of 30,000 pixels.
PSB is the file format for Photoshop files larger than 2GB and has a maximum document size of 300,000 x 300,000 pixels.
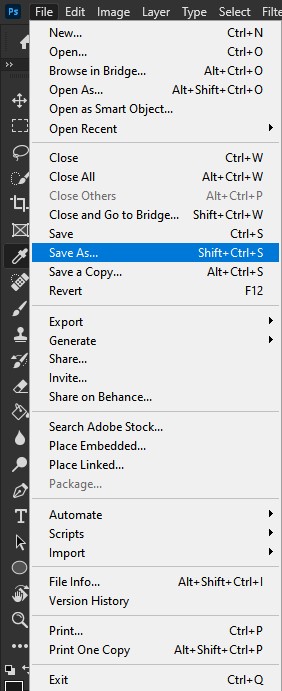
Exporting
Export settings can be accessed through Export > Export As...
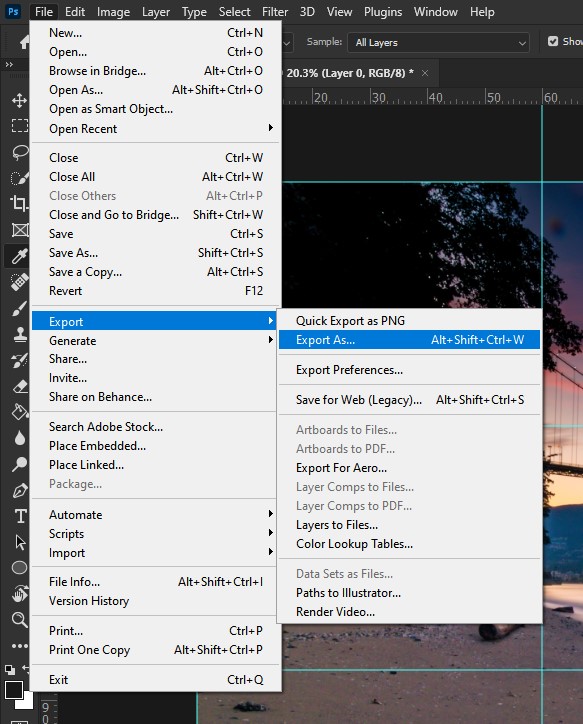
A new export window will appear which allows the format of the export to be changed to PNG or JPG.
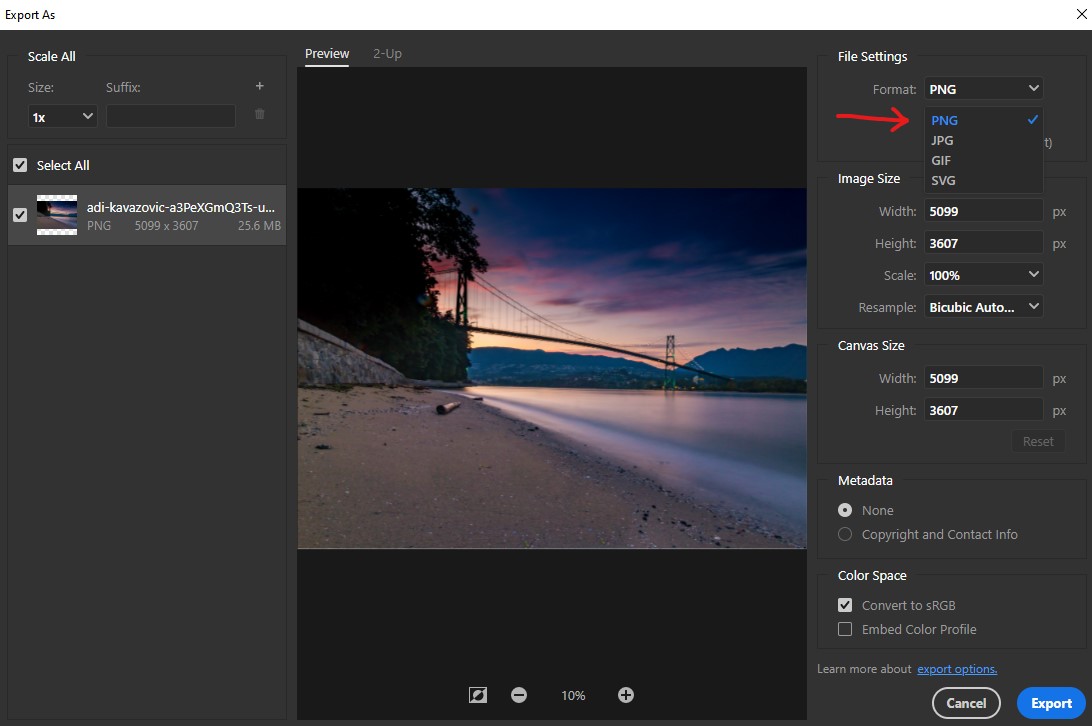
TIFF, PSD and PSB can be accessed via File > Save As.