Adobe Photoshop (Ps)- Tutorial 1
Save the Tigers Poster
Difficulty: Medium-Advanced
What you will learn: Basics of photoshop files, layers, masks, selection tools and transparency
Download these two images: TIGER, RAINFOREST
(right click and "save as" to save them to your computer)
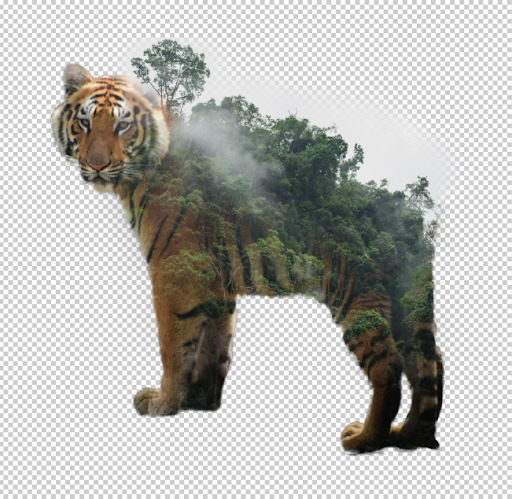
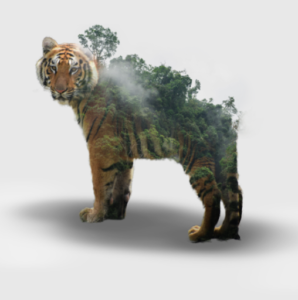
Result:

Step 1 - Make a new empty photoshop file.
File > New
Use the settings shown. (This will make an A4 poster at print resolution)

Step 2 - Setup image layers
Open the tiger and rainforest files using:
File > Open
When the file opens, perform these steps:
Select > All
Edit > Copy
File > Close
Click on the tab of the file you made in step 1
Edit > Paste
You will now see another layer with this image.
Repeat the above for the other image. You should now have a single file open with all the images as layers.
Save your file to your computer or hard drive using:
File > Save as
Make sure to select .psd (Photoshop file) as the format.
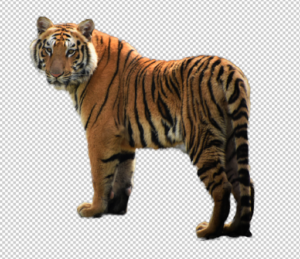
Step 3 - cut the tiger from its background
Go to the toolbar (left side of the screen) and select the Quick Selection Tool or press W on your keyboard.
![]()
Click on the area of the Tiger and select the entire Tiger without the background. Your area of selection will be shown by the “marching ants” border which will look like a black and white dotted line. Deselect areas by holding the Option/Alt key on the keyboard while clicking with your mouse on the parts you would like to deselect.
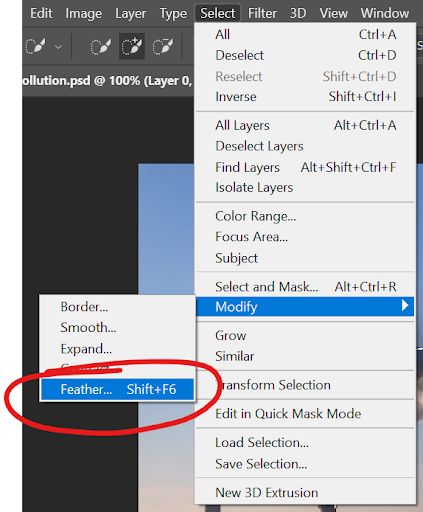
Feather the selection of the Tiger by going Select > Modify > Feather. A Feather Selection popup will appear. Set Feather Radius to 3 pixels and hit OK.
With the Tiger layer selected, copy and paste the selection (or use the quick Layer > New > Layer Via copy or press Ctrl/⌘ + J. Rename the new layer to “Tiger” by double-clicking on the name of the Tiger layer.
Step 4 - clip and mask rainforest layer
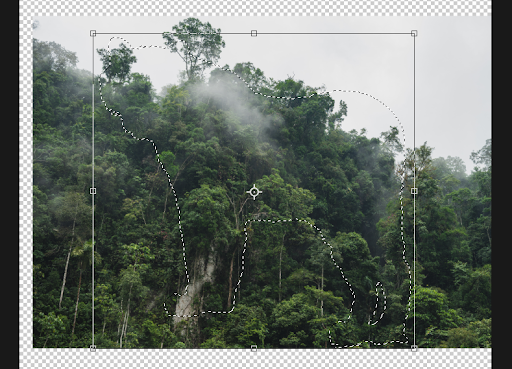
Select the Rainforest layer and resize the image to cover the Tiger. Go to Edit > Transform > Scale or press Ctrl/⌘ + T.
Create a clipping mask for the Rainforest layer. With the Rainforest layer selected, hold the Ctrl/⌘ key and click on the Tiger layer thumbnail (marching ants in the shape of the Tiger will appear).
Then click the add layer mask button. It should look like this as a result:

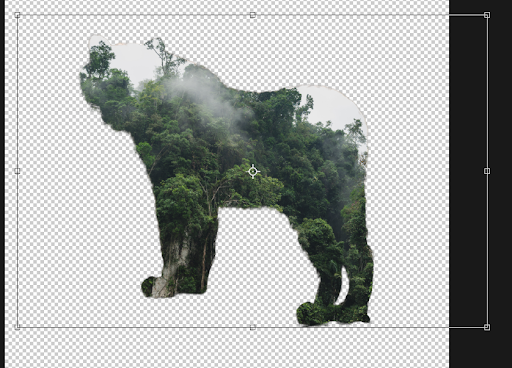
Step 5 - Create group and mask group
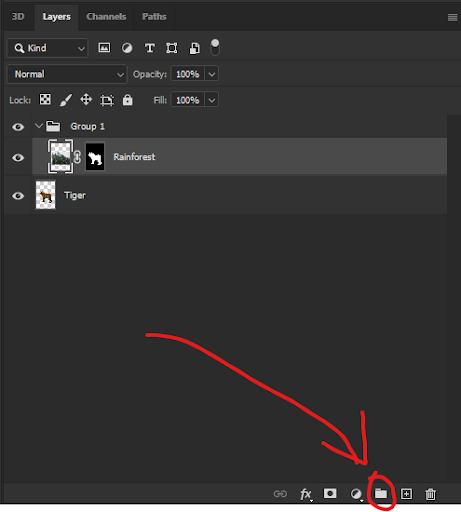
Create a new layer group by clicking on the folder icon or pressing Ctrl/⌘ + G and drag the Rainforest layer into the layer group.
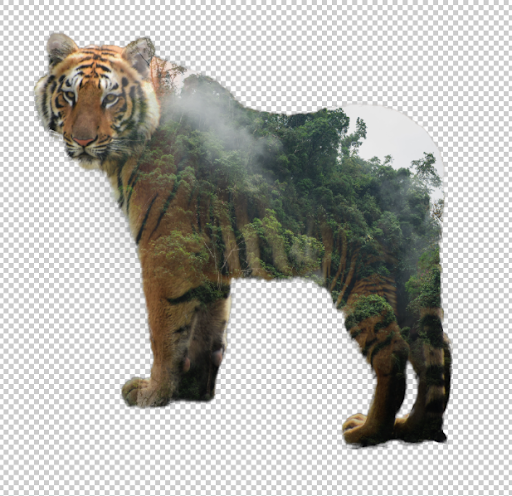
Create a new mask for Group 1 and paint away the rainforest from the Tiger’s head and legs using the Brush Tool (B key) and the colour black (Note: black HIDES and white REVEALS the layer). The result should look similar to this:
Step 6 - blend rainforest layer
Select the Rainforest layer and hold Option/Alt key. While still holding the Option/Alt key, drag the Rainforest layer to the top of the list of layers. This should create a copy of the Rainforest layer. Rename Rainforest copy layer to Lighten Blend. Result:
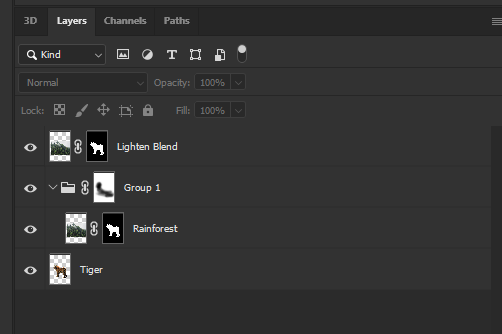
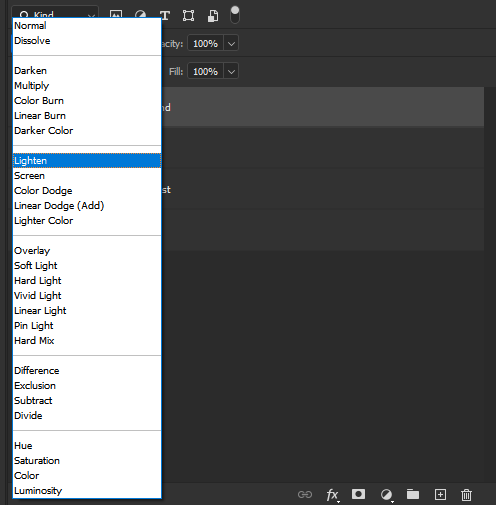
With the Lighten Blend layer selected, change the blending mode to Lighten.
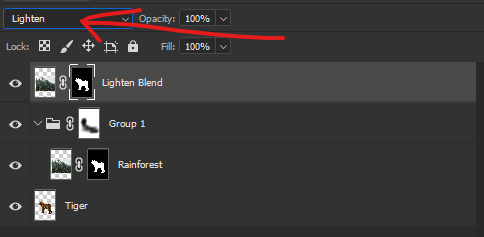
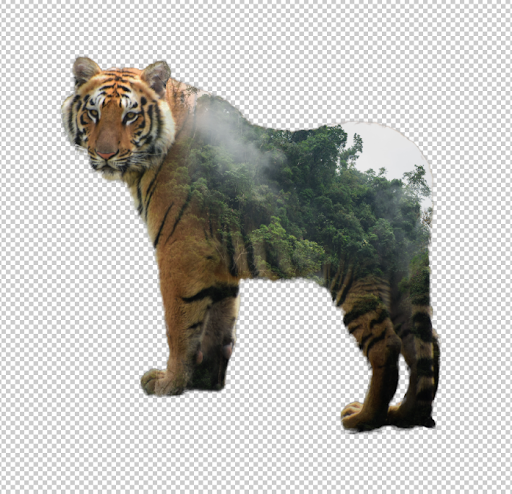
With a black coloured Brush Tool, paint parts of the Lighten Blend layer mask around the legs and head of the Tiger to reveal the layer. The idea is for the Lighten Blend layer to act as a transition between the Rainforest and Tiger. Results should look similar to this:
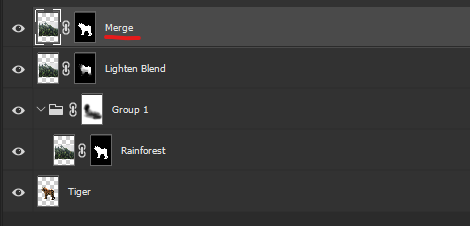
Step 7 - create merge layer
Hold Option and drag the Rainforest layer and to the top of the layer list. Result:
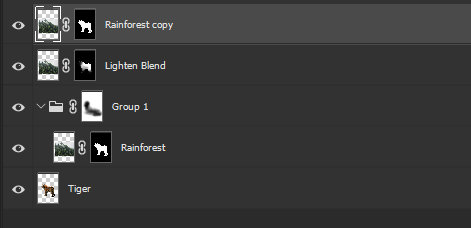
Rename Rainforest copy to Merge.
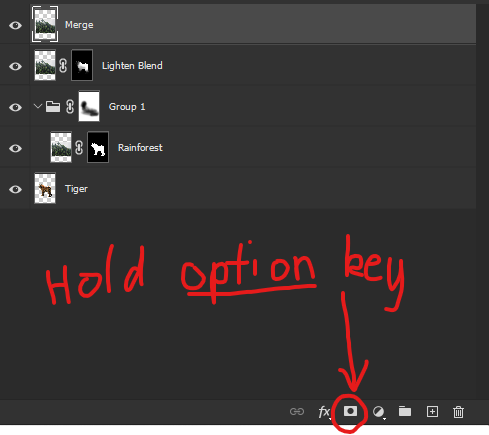
Select the Merge layer’s mask, right-click on the mask thumbnail and select Delete Layer Mask. Next, hold the Option key and click on the Add Layer Mask button. This will result in a new black layer mask for the Merge layer.
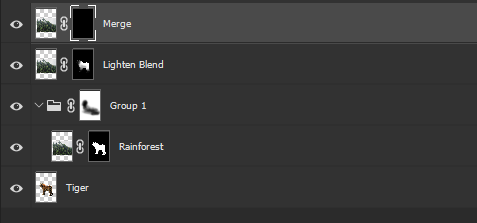
Step 8 - blend rainforest and remove sky
With the Merge layer mask selected, use the Brush Tool and the colour white to paint the back of the Tiger to reveal parts of the trees and sky of the Rainforest image. Results should be similar to this:
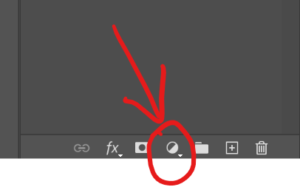
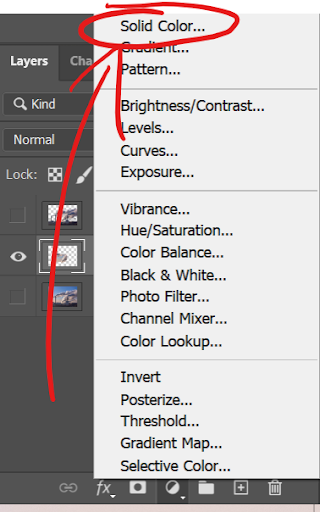
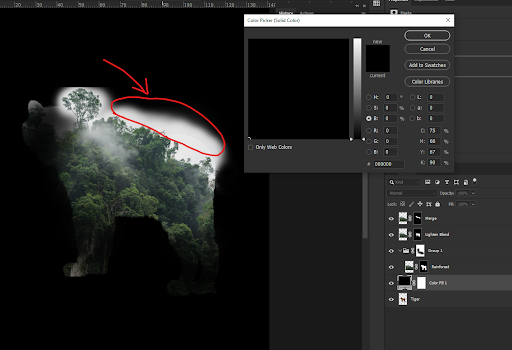
Click the Create New Fill or Adjustment Layer icon and select Solid Colour. A new popup box with a colour picker will appear.
With the Eyedropper Tool, colour pick the sky of the Rainforest image and press OK. This should match the colour of the sky and create a smooth transition between the sky and background colour.
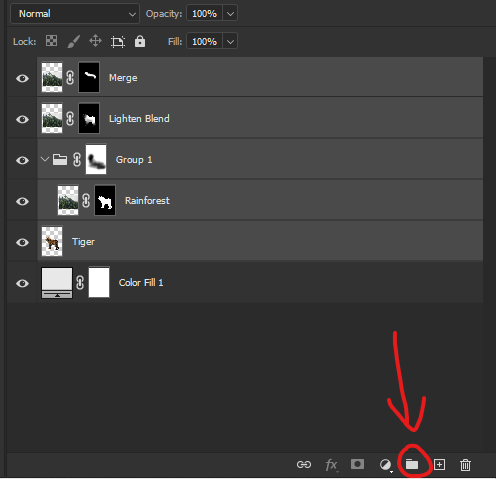
Step 9 - group layers
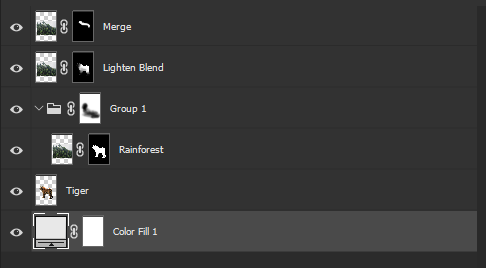
Drag the Colour Fill 1 (Solid Colour) layer to the bottom of the layer list. It should be in this order:
Select all the layers except the Colour Fill 1 layer by holding Shift, select the Merge layer and then select the Tiger layer. Create a new group by clicking the Create a New Group icon. Rename the new group from Group 2 to Tiger Double Exposure.

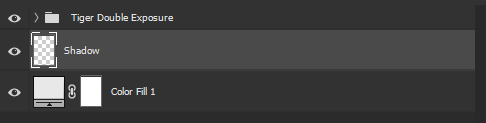
Step 10 - add shadow
Create a new layer and name it Shadow. Make sure the Shadow layer is in between the Tiger Double Exposure group and the Colour Fill 1 layer.
With the Brush Tool and the colour black, change the Opacity in the brush properties and set it 20-40%.

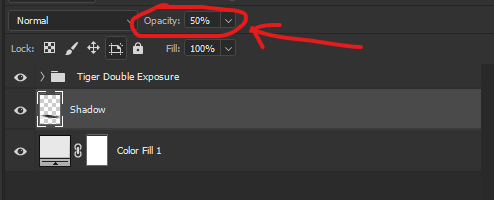
Paint an ellipse shadow underneath the Tiger and change the Opacity of the Shadow layer to around 50% (you can tweak the opacity of the shadow to whatever looks natural to you).
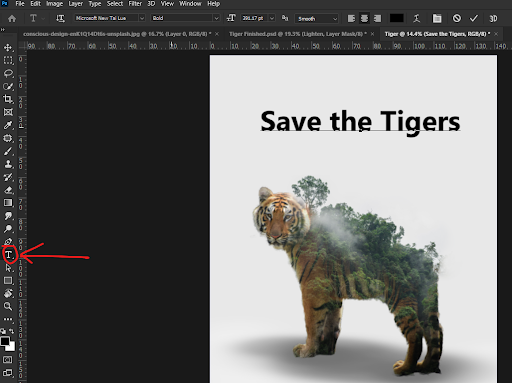
Step 11 - add text
Select the Text Tool on the side bar and click above or below the Tiger to create a textbox. Type in what you want and then hit Enter.
Step 12 - export final file
Save your work as a .psd master (File > Save) so you can come back and edit the layers later.
Go to the option bar at the top of the screen and select File > Export > Export As. This will cause an export popup to appear.
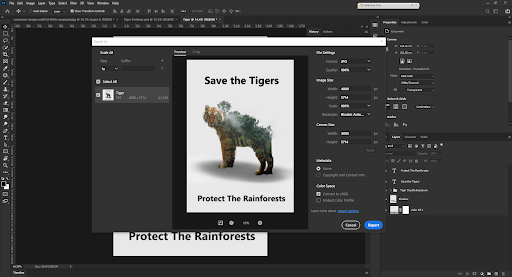
Ensure that File Settings > Format is set to JPG. Leave other settings to default. Next click Export.
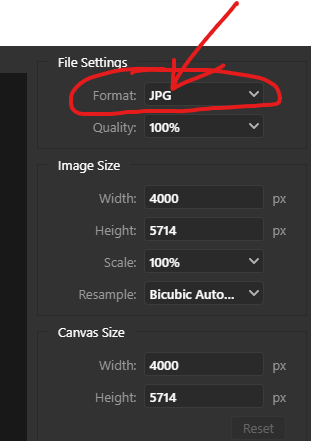
Name the export and save the JPG export to your hard drive.
And you’re done! Nice job!
Originally developed by Nathaniel Lowe, April 2021