Difficulty: Basic
What you will learn: Three ways to export your After Effects composition.
Much like importing, there are a few different ways to export based on the type of project. Exporting from After Effects is much like exporting from any non-linear editing software (NLE), but if you want to export straight into a Premiere Pro project, Adobe has made it easier.
Option 1 – Exporting a composition with a solid background
- Select your composition in the “Project” window.
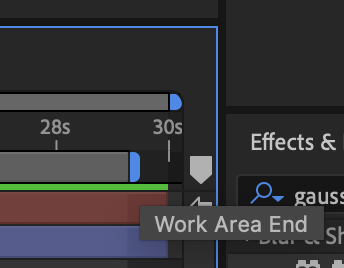
- Select the blue marker on the far right-hand side of the timeline on the time-ruler and pull it back until you get to the end of your animation or how long you would like the composition to go for.
The blue tab should say “Work Area End” and it determines how long your composition goes for. If left untouched, your project will export at the full time length which is 30 seconds by default.
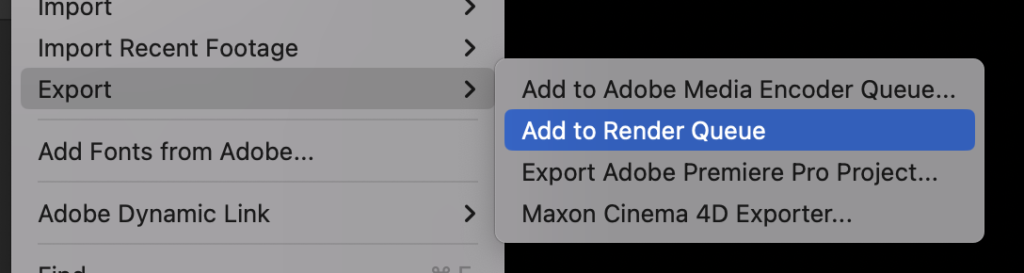
- Navigate up to “File” at the top of the screen, click “Export” and then “Add to Render Queue”. This will open up the Render Queue at the bottom of the screen.
- All of the parameters here can be edited by selecting the arrow next to them. Make sure that “Best Settings” is selected next to “Render Settings”.
- There are a few options under “Output Module” that can work, select the one that suits your requirements:
- “Lossless” is always going to be the highest quality version of this effect and is the recommended setting. The downside is that the file will be very big.
- “High Quality” will strike a more reasonable balance between file size and quality, but it will still not be small.
- “H264” will be the most space-efficient, but will be of a lower quality and may cause issues with performance if you choose to edit it further in an NLE like Premiere Pro.
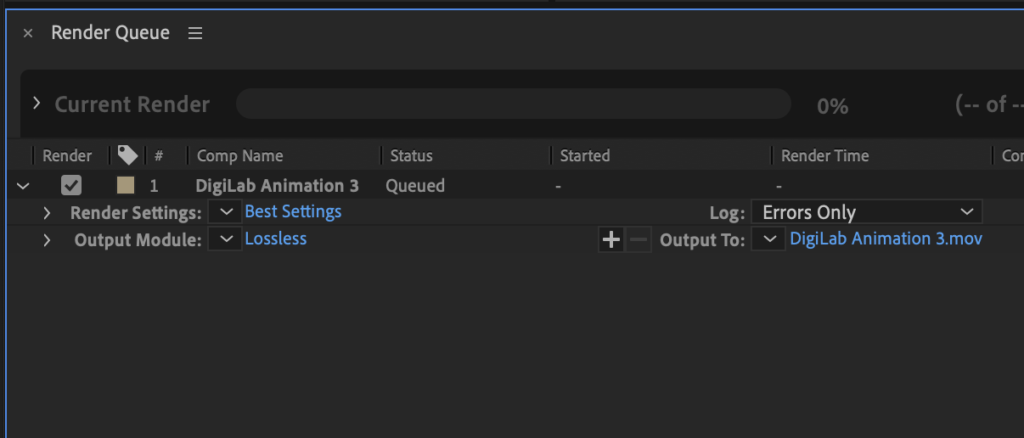
- Select where you’d like to save the export in “Output To:” by clicking the blue “Not yet specified” text.
- Once all the settings are applied, click the “Render” button in the right hand corner of the “Render Queue” window.
Option 2 – Exporting a composition with a transparent background
There are fewer options when it comes to exporting a file with a transparent background. The file size in the end will be large but it will ensure that the background is transparent when the file is brought into NLE’s like Premiere Pro. The transparent background may not be apparent when viewed in media players like VLC or Quicktime.
- Select your composition in the “Project” window.
- Select the blue marker on the far right-hand side of the timeline on the time-ruler and pull it back until you get to the end of your animation or how long you would like the composition to go for.
The blue tab should say “Work Area End” and it determines how long your composition goes for. If left untouched, your project will export at the full time length which is 30 seconds by default.
- Navigate up to “File” at the top of the screen, click “Export” and then “Add to Render Queue”. This will open up the Render Queue at the bottom of the screen.
- All of the parameters here can be edited by selecting the arrow next to them. Make sure that “Best Settings” is selected next to “Render Settings”.
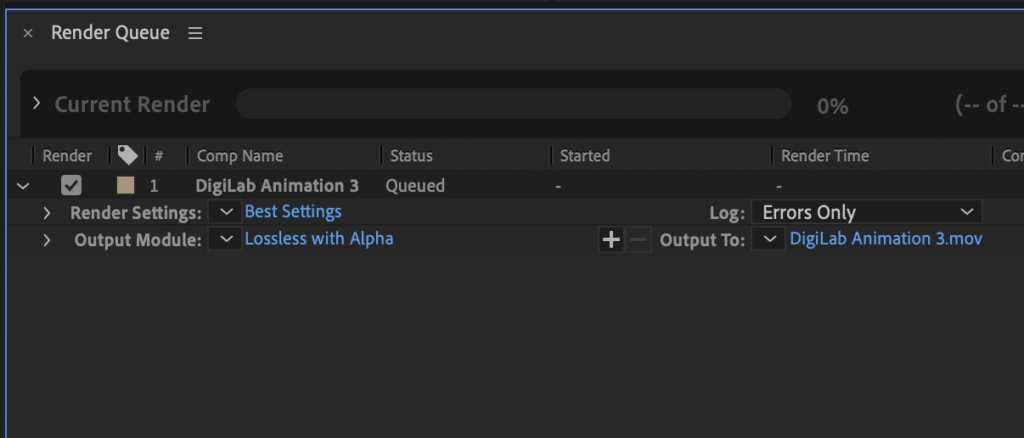
- Under “Output Module” select “Lossless with Alpha”. This will create a very large file but it will allow the composition to have a transparent background when viewed in NLE’s like Premiere Pro. The transparent background may not be visible in media players like VLC.
Option 3 – Exporting any composition to Premiere Pro
Adobe is great at having their programs work together, as a result, you can just save your composition as an After Effects project and bring that right into Premiere. This method will allow you to go back into After Effects and make changes which will automatically sync with Premiere Pro.
- Select your composition in the “Project” window.
- Select the blue marker on the far right-hand side of the timeline on the time-ruler and pull it back until you get to the end of your animation or how long you would like the composition to go for.
The blue tab should say “Work Area End” and it determines how long your composition goes for. If left untouched, your project will export at the full time length which is 30 seconds by default.
- Make sure your composition is saved by clicking “File”, “Save as” and then finding a suitable location in your Premiere Pro video project folder.
- Go into your Premiere Pro project and go “File” and then “Import”.
- Navigate to the After Effects project file you just saved.
- Select the composition you’d like to bring in from the popup and click “OK”. The composition will now be in your Premiere Pro bin of choice.