Adobe Illustrator (Ai)- Tutorial 1
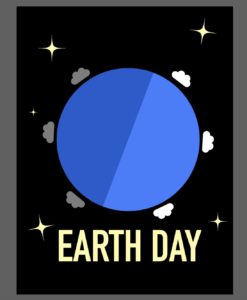
Earth Day Poster
Difficulty: Basic - Medium
What you will learn: Basics of shapes, layers, tools and text in Illustrator.
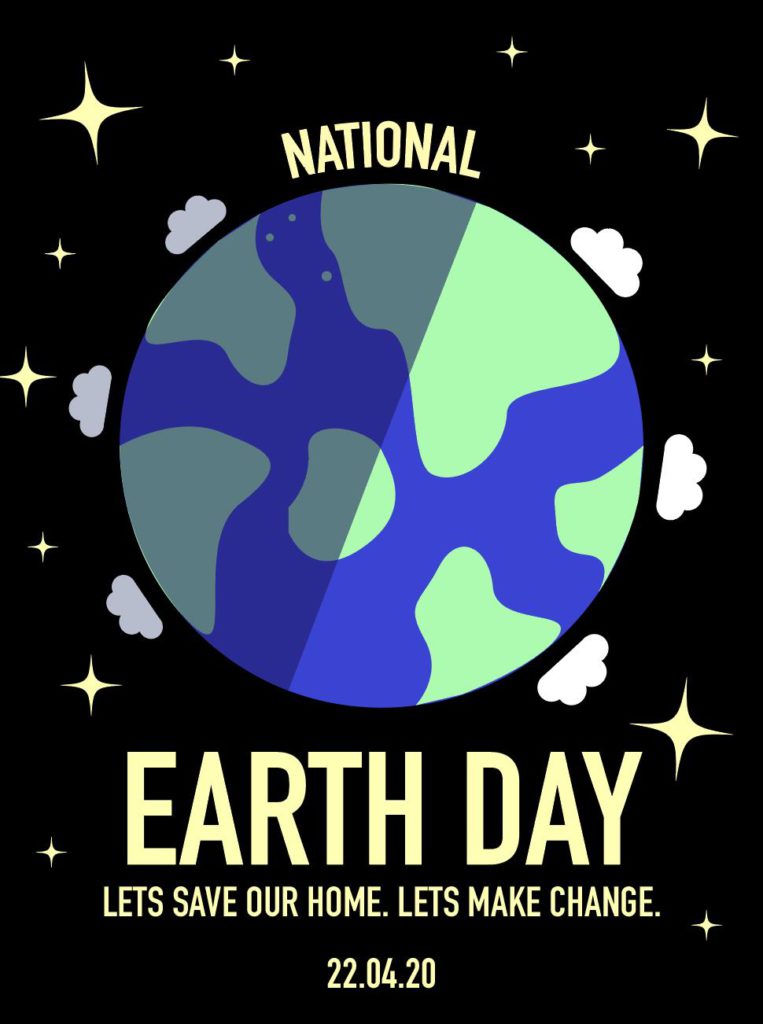
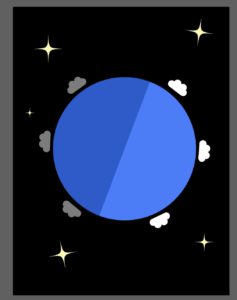
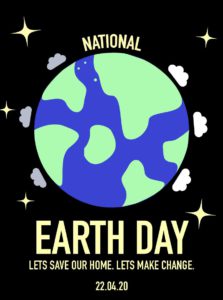
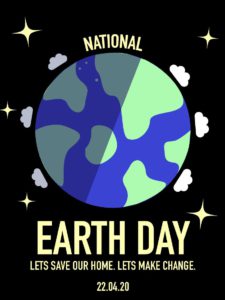
Result:
Step 1 - Setup file and background
Select ‘Art & Illustration’ then select ‘Poster’ in blank document presets that appear when you open Illustrator. Can also make a new file with File > New.
Go to the options bar at the top of the screen and select File > Save As. Name the file and save the Illustrator file to your student hard drive, NOT the computer desktop as a .ai file type.
Go to the toolbar (left side of the screen) and right click the Line Segment Tool (l) ![]() so that other shape options appear. Then press the Rectangle Tool (M).
so that other shape options appear. Then press the Rectangle Tool (M). ![]()
Draw a rectangle on the blank document and change the colour to black by double clicking colour Fill (X) on the toolbar.
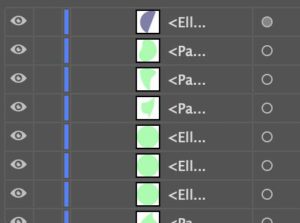
Create a new layer ![]()
*Note: If you want your layers to stay organised, double click the words “Layer 1” or “Layer 2” and rename them.
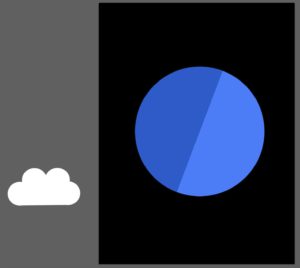
Step 2 - Create Earth base shape
- Right click on the Rectangle Tool and select the Ellipse Tool (L).

- Draw a circle. Then select the Selection Tool (V)
 to move the shape.
 - Double click the colour Fill on the toolbar, pick a blue for the earth.
*Note: Click the ‘Stroke’ next to the colour ![]() and then click the mini square with the red line through it to ensure there is no outline on the shape.
and then click the mini square with the red line through it to ensure there is no outline on the shape. ![]()

- Select the circle, hold option/alt and drag it out to create a double.
- Create a new Layer. Select the anchor, move it in a clockwise direction to create a semi-circle.
- Change the colour to a darker blue.
- Go to the top toolbar, select opacity, then make the semi-circle 50%.
- Use the corner point/s to adjust the shape on earth (so that half of the earth is shaded and on an angle).

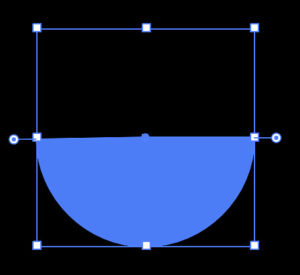
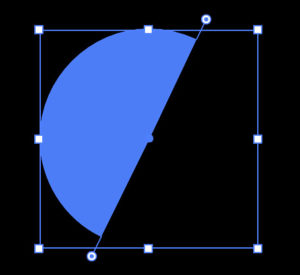
- Move it back so it overlaps the base shape. It should snap.

Step 3 - make the clouds
- Go to the toolbar and select the Line Segment Tool
 .Make sure the stroke colour is white.
 - Create a short horizontal line.
- At the top toolbar, move the arrows up next to ‘Stroke’ so that it’s thickness is 5pt.

- Right click the Line Segment Tool and select the Ellipse Tool (L).

- Create circles over the line (make sure they are all overlapping each other.

- Select all the elements in the cloud.
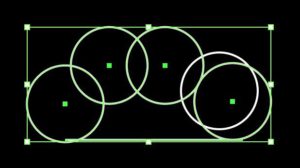
- Select the Shape Builder Tool in the Toolbar.
 Press and hold over all of the shapes so that they all combine to one.
 - Swap the colour fill by selecting the 2 arrows next to the colour settings.

- Move the clouds out of the way for now. We’re gonna make little stars.
Step 3 - Make some stars
- Select the Ellipse Tool (L). Draw a circle anywhere on the page.
- Change the colour Fill (X) to a yellow.
- Using the Selection Tool (V), select ‘Effect’ in the options bar. Distort & Transform > Pucker & Bloat.
- Drag the circle towards the pucker line (to about -90%). Press Ok.

- Select the shape, hold shift and drag the corners in (to make the star smaller, without changing its shape).
Step 4 - make copies of stars and clouds
- Click the star, hold option/alt to drag it out and create an identical copy.

- Repeat this process and move the stars wherever fits well on your page. Change the sizes and slightly rotate a few of them.
- Using the Selection Tool, hold option and create multiple clouds.
- Move them to where you want them above the earth. Hold shift and drag the corners in to make them smaller. Rotate the clouds using the rotation tool (R).

- After rotating and positioning the clouds, select the ones on the darker side of the earth and change their colour Fill to a darker grey.
Step 5 - add the text
- Create a new Go to the toolbar and select Type Tool (T)
 to create a text box.
 - Type ‘EARTH DAY’. Highlight it with your mouse and go to the top right of the toolbar and move the arrows up or down to change the text size.

- Change the size to 265pt and the font to DIN Condensed Bold.
- Select the text, then click on the Eyedropper tool (i)
 . If you now click on one of the stars we made earlier, the colour of the text should change to the colour of the star.
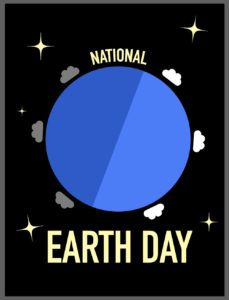
- Repeat this process to create another text “NATIONAL”.
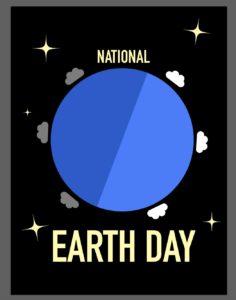
- Select “NATIONAL” with the Selection Tool and then head to Effect in the options Effect > Warp > Arch. Set it to 16%.
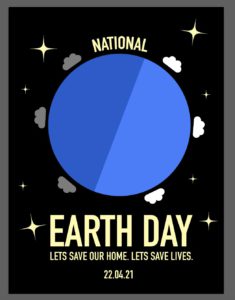
- Add another text under “EARTH DAY”. Call it “LET’S SAVE OUR HOME. LETS SAVE LIVES.” Under that write the Earth Day date “22.04.22” (or whichever is next!)
Step 6 - add the countries
- Go to the toolbar and select the Paintbrush Tool (B).

- Draw ‘countries’ by dragging the mouse & connecting it to where you started. You can then use the fill colour to make them green. *Note: Don’t forget to use the Selection Tool (V) before you do this.
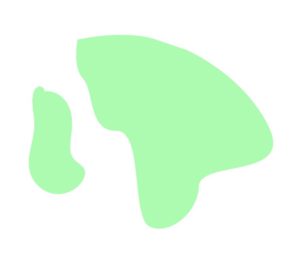
P.S. I am so bad at geography so I just draw random shapes…
- Scatter the ‘countries’ all over the Earth.
- Make sure the shadow layer (from step 2) is over the green country layers in the layer view to give the earth a shadow effect. (You will need to re-order the layers)
Woohoo so proud of you for making it here! 🙂
Step 7 - export your poster
- Firstly, save you work with File > Save.
- If you want a PDF file, Use File > Save as and select PDF.
- If you want an image file also (or instead of), go to the option bar at the top of the screen & select File > Export As. This will cause an export popup to appear.
- Ensure that File Settings - Format is set to PDF. Leave other settings to default. Next click Export.
- Nice job you’re done!
Originally developed by Amy Shidiak, April 2021