Adobe InDesign (Id) - Tutorial 1
Getting started with InDesign, exploring the Type Tool
What is Adobe InDesign?
A versatile application in the Creative Suite, InDesign blends word processing, illustration, formatting, and visual edits into one program. Used to publish magazines such as Vogue and Time, edit basic architectural drawings, or designing your student diary and textbooks, it combines basic features from a range of programs into a single interface. It saves most of its resources to focus on word processing options, with advanced edits reserved for other applications, which InDesign supports by linking files into the project directly. Any edits in the original will automatically synch across into the document in real-time
The User Interface
NOTE: To enlarge images, right-click on them and select 'Open image in new tab'. In each set of images, the first screenshot will be from Windows 10, the latter on macOS Big Sur. Interchange Ctrl/Cmd (⌘) shortcuts depending on your operating system - other changes will be noted accordingly.
First, open InDesign, and create a new document. For this, we'll use the default A4 size. Continue to the interface - it'll look something like this:
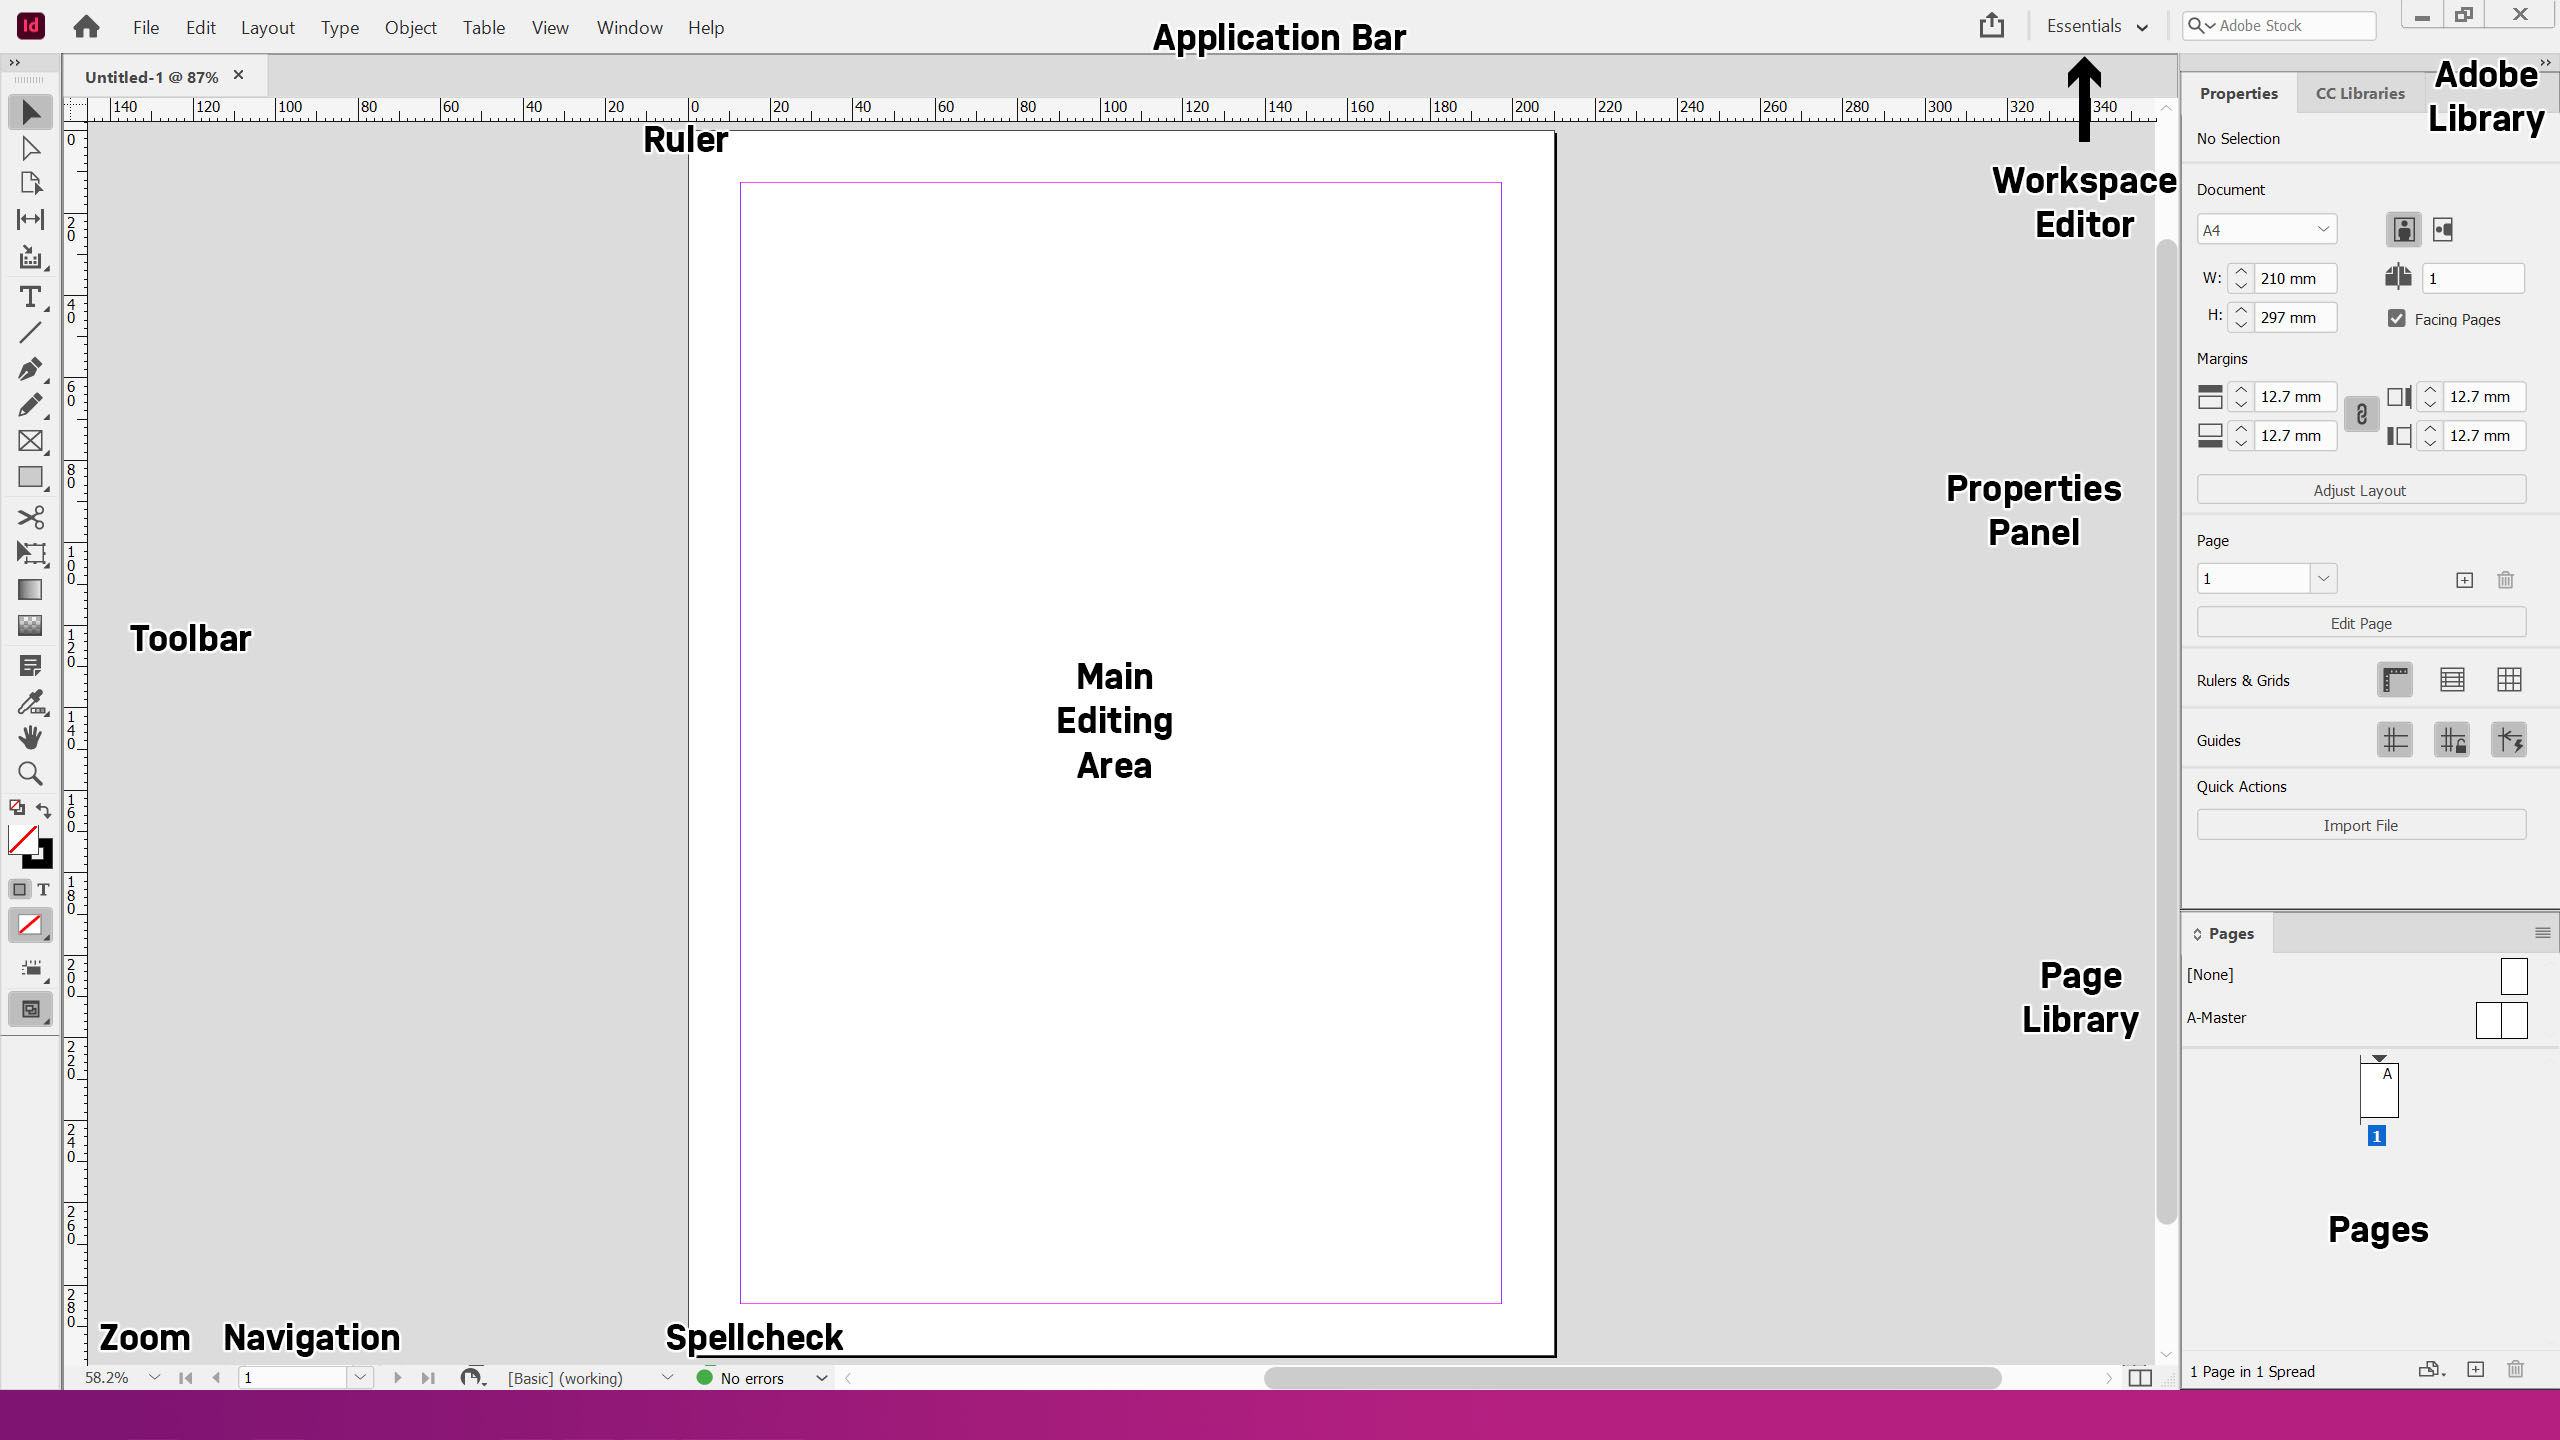
- Application Bar: Home of commands without special tools for them, such as generating QR codes or creating tables
- Toolbar: Left sidebar which houses all frequently used tools in Adobe InDesign
- Properties Panel: This changes depending on the tool and object selected, and allows you to make further adjustments to your selected individual element
- Main Editing Area: The page you are editing and your workspace
- Workspace Editor: Use if you don't like the current layout. Not recommended if you need to be switching devices often
- Adobe Library: Adobe's library of over one million assets and plugins to integrate into your project
- Pages: Lists all the pages in your document
- Page Library: Allows you to set default layouts on a title page, and a left/right master page. These are templates, usually reserved for some graphics and page numbers in magazines and similar publications
(Shortcut: T) Type Tool
Unlike other Adobe programs, a text box must be drawn to use the type tool. The properties panel for text is also noticeably more detailed and focused than other applications. To create a text box, use the shortcut T, then click and drag
You can expand each submenu under properties by clicking the three dots at the bottom of each section to expand it. There are plenty of editing options for text alone:
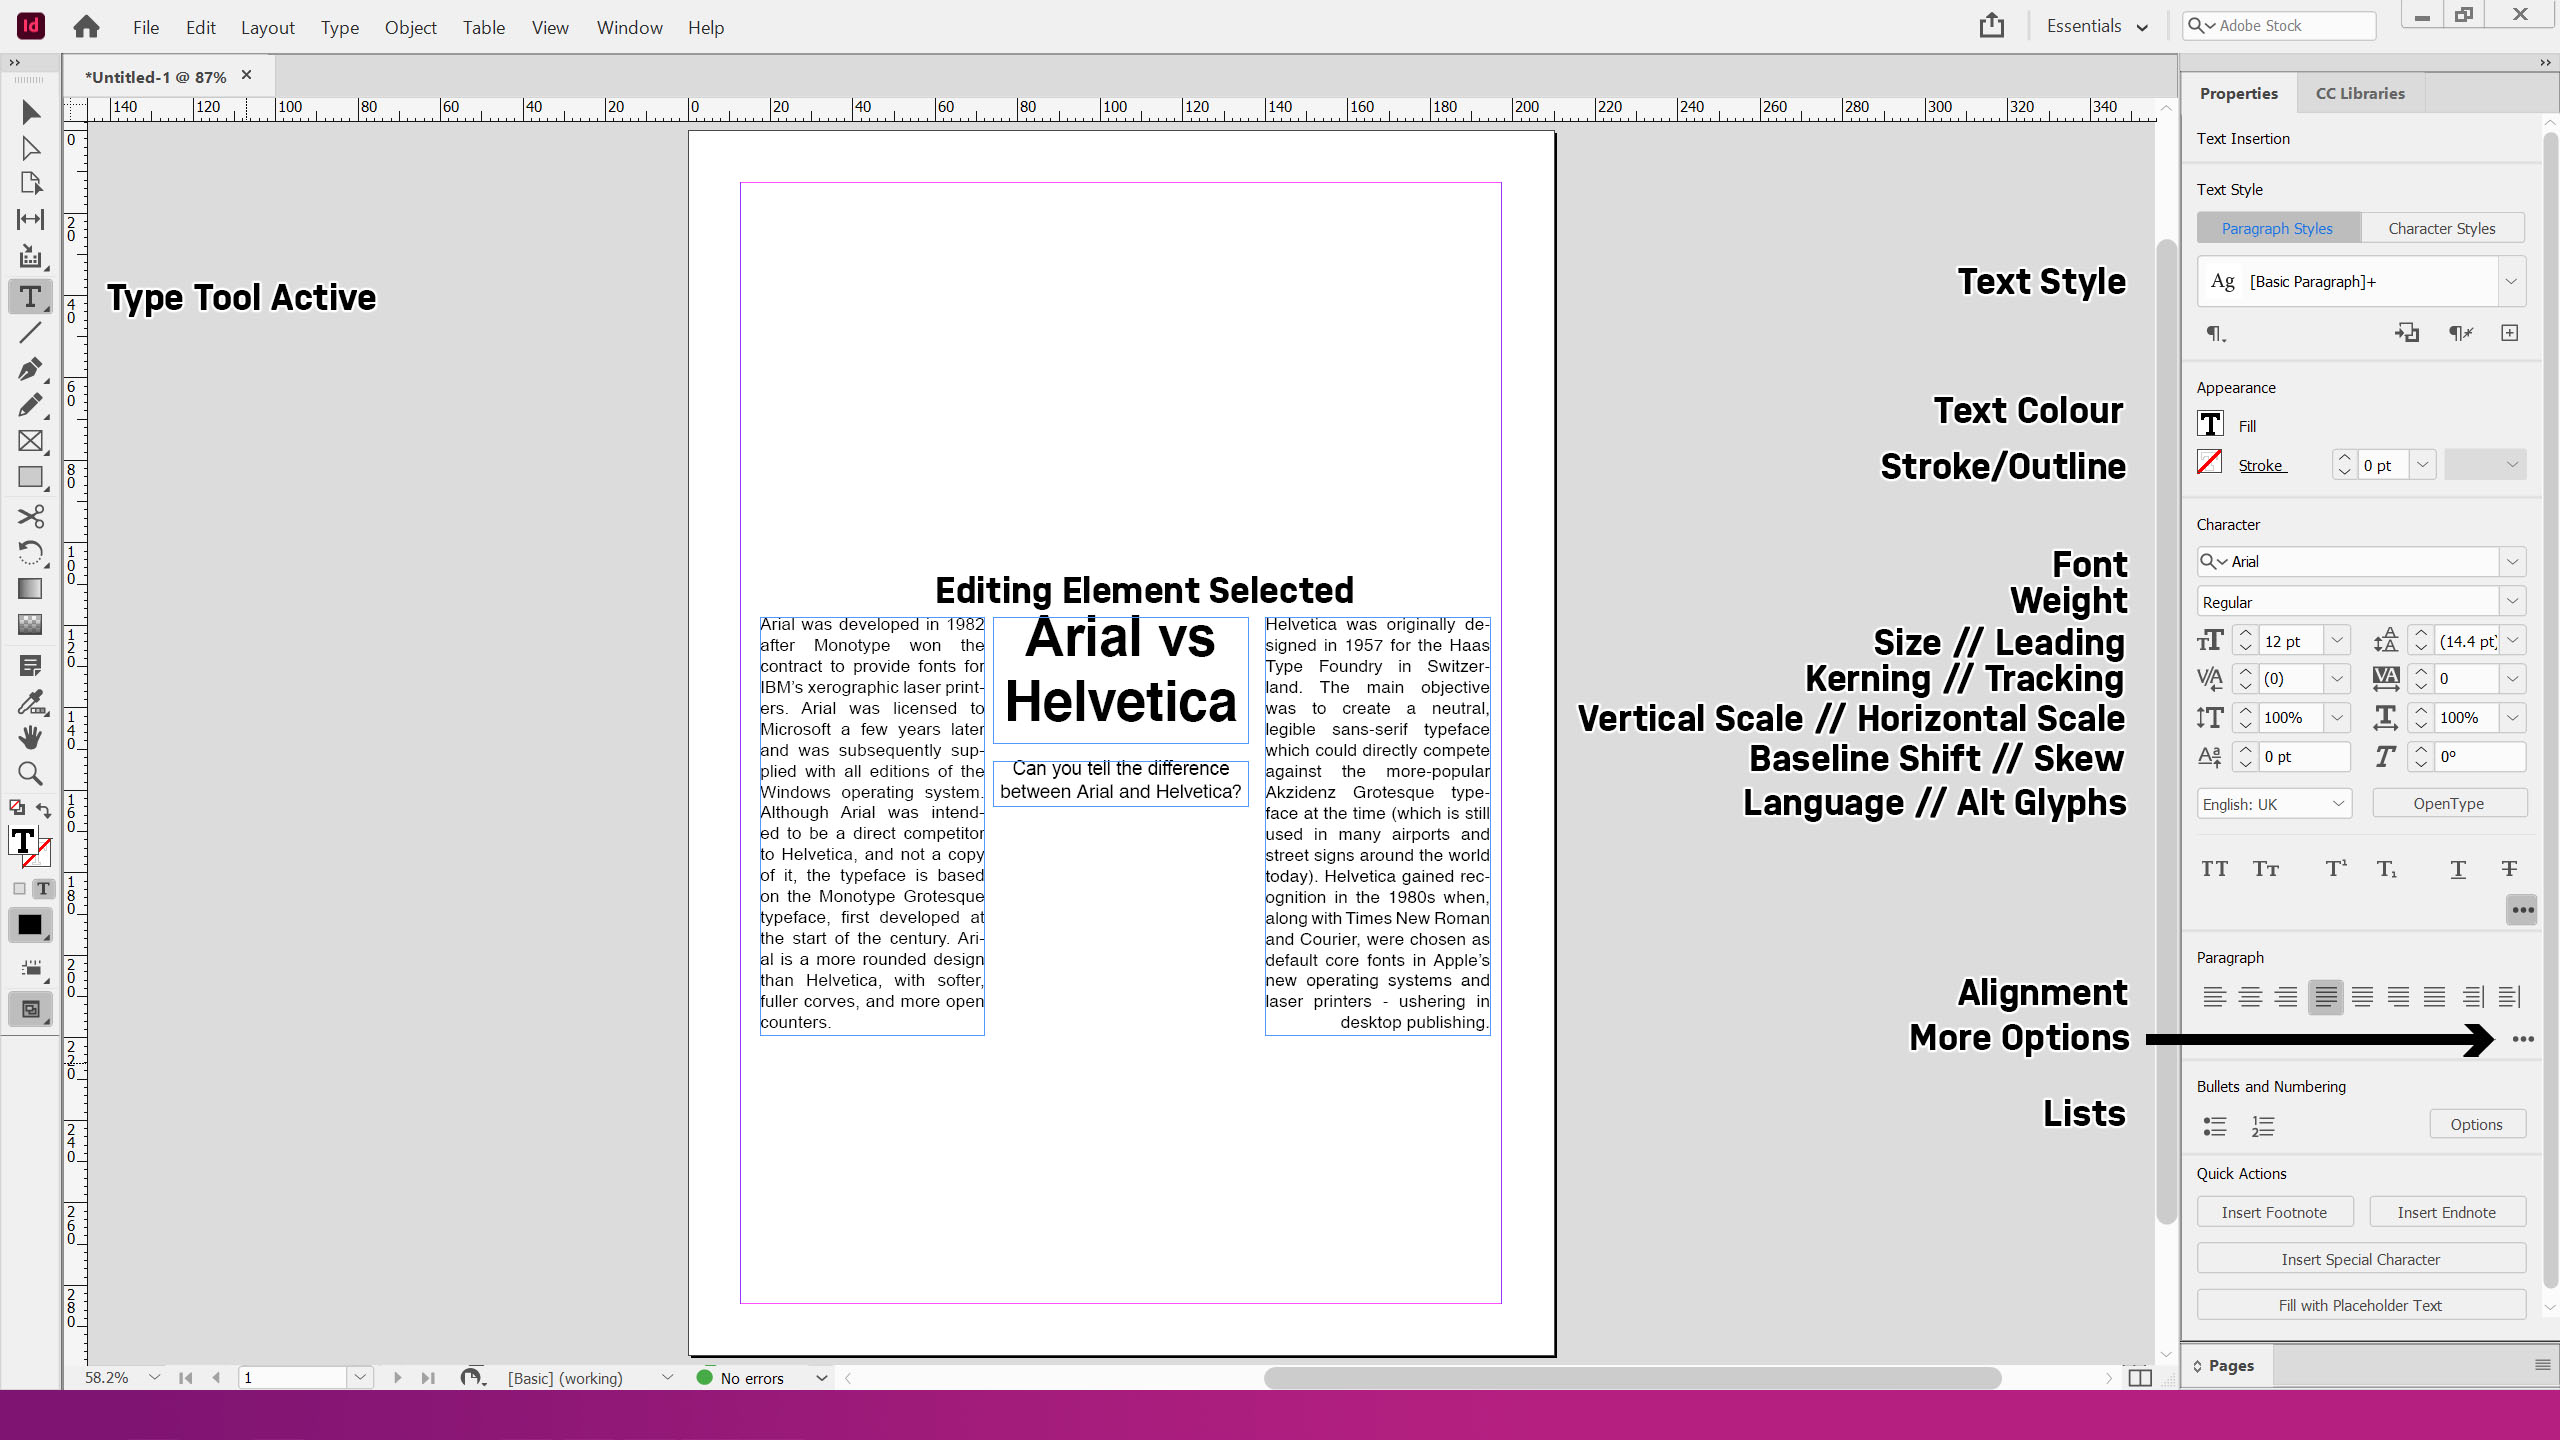
The ones you need to be familiar with are the font and weight, size, and alignment options. In this example, the title and subtitle are aligned centrally, but the two columns are justified with the last line held left and right respectively. As a basic alignment guide:
- Always align left on the left side of the page, and hold to the right on the right side of the page
- Always justify (align as a box) when typing in a column, text box, or caption
And a similar rule can be said for headings - Heavy weights for titles, lighter weight and smaller size for body text and captions.
Wrapping Text
In the above screenshot, we have two bodies of text which outlines the history of each font. The alignment options selected have resulted in some words at the end of each line leading into the next. It is not mandatory to change this, but there are two methods to do so manually:
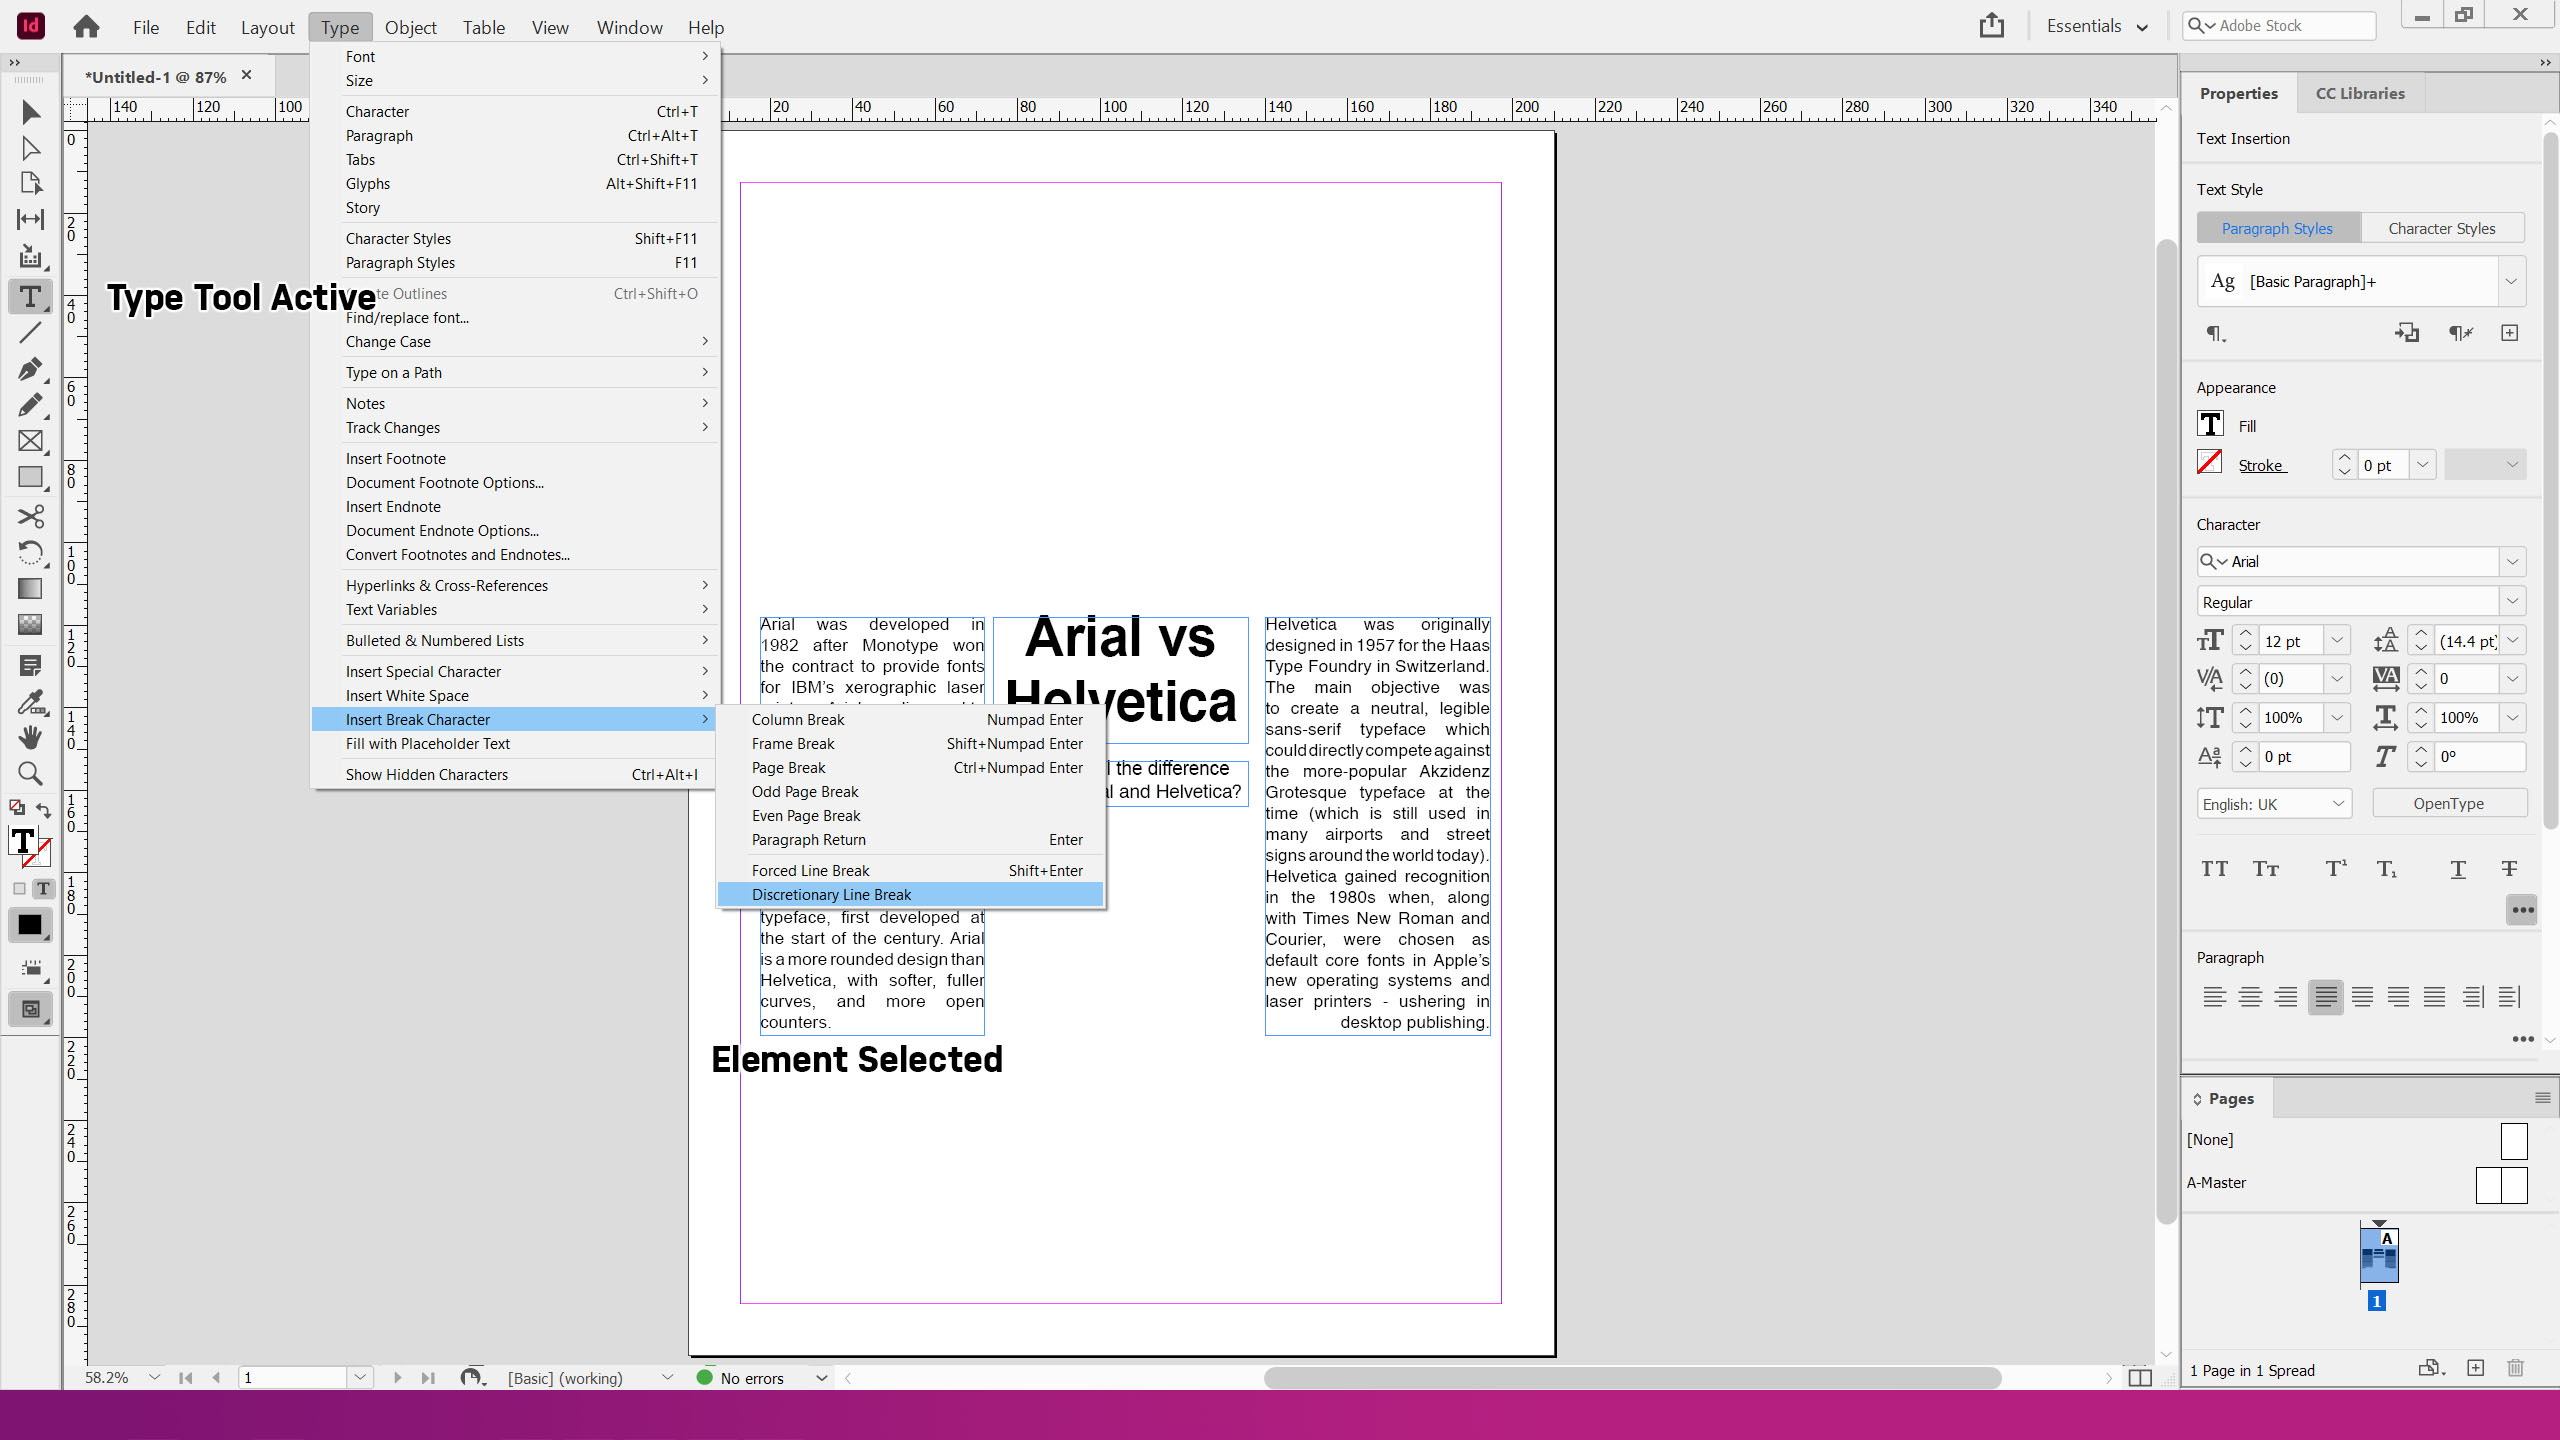
- Forced Line Breaks
- Discretionary Line Breaks
Forced line breaks (Shift + Enter) forces a line break to occur at a certain point. With the type tool active and the element selected, place the cursor at the start of the hyphenated word and simply press shift + enter to force the break
Discretionary line breaks (no shortcut) are identical to the above, but only applies where a line becomes too long to stay together. You can use it the same way as the forced line break, but with the proviso that it only appears if the text requires it
And to execute the above automatically for the paragraph, simply open the paragraph panel (App bar -> Type -> Paragraph, shortcut: Ctrl/⌘+Alt/⌥+T) and deselect the hyphenation check box at the bottom and confirm. It is also possible to commit this for an entire text style when setting the default under properties -> text style.
After this is actioned, the text now looks like this (see right column):